Add Row
Add Element
Luxury Landscaping Insider
update
Luxury Landscaping Insider
update
Add Element
  • Home
  • Categories
    • Trendsetters
    • Design Dialogues
    • Transformation Tales
    • DIY Luxe
    • Material Mastery
    • Budget to Bliss
    • Event Spotlight
    • Luxury Landscaping Blog
    • Product Reviews
SUBSCRIBE TO NEWSLETTER  
  • update
  • update
  • update
  • update
  • update
  • update
  • update
November 28.2025
1 Minute Read

Green Gardening Hacks: Build Your Backyard Bin

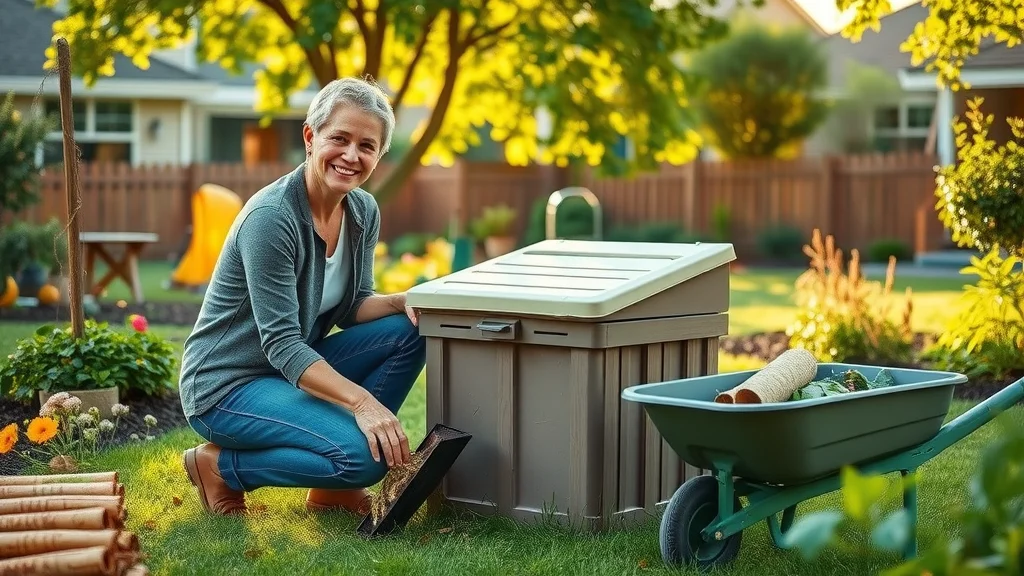
Did you know that more than 30% of what we discard is actually food scraps and yard waste that can be transformed into rich, garden-nourishing compost? With Americans sending millions of tons of organic material to landfills each year, embracing an outdoor compost bin is more than just an eco-friendly trend—it's a game-changer for your backyard and the environment. In this easy-to-follow guide, you'll discover clever green gardening hacks, practical solutions, and expert tips to help you confidently build, choose, and maintain the ideal compost system for your home.

Unconventional Truth: Why An Outdoor Compost Bin Is a Gamechanger for Your Backyard

The reality behind most backyard waste is startling: food scraps and yard trimmings make up a massive portion of what ends up in our landfills. Yet these organic materials, when processed in an outdoor compost bin, can decompose into nutrient-rich finished compost that revitalizes your garden and cuts your household waste sharply. Unlike a basic compost pile or wire bin, an outdoor composter offers organization, easy access, and crucially, the ability to handle diverse kitchen and garden waste efficiently all year long. This means less landfill contribution, improved garden yields, and even potential savings on store-bought soil enhancers.

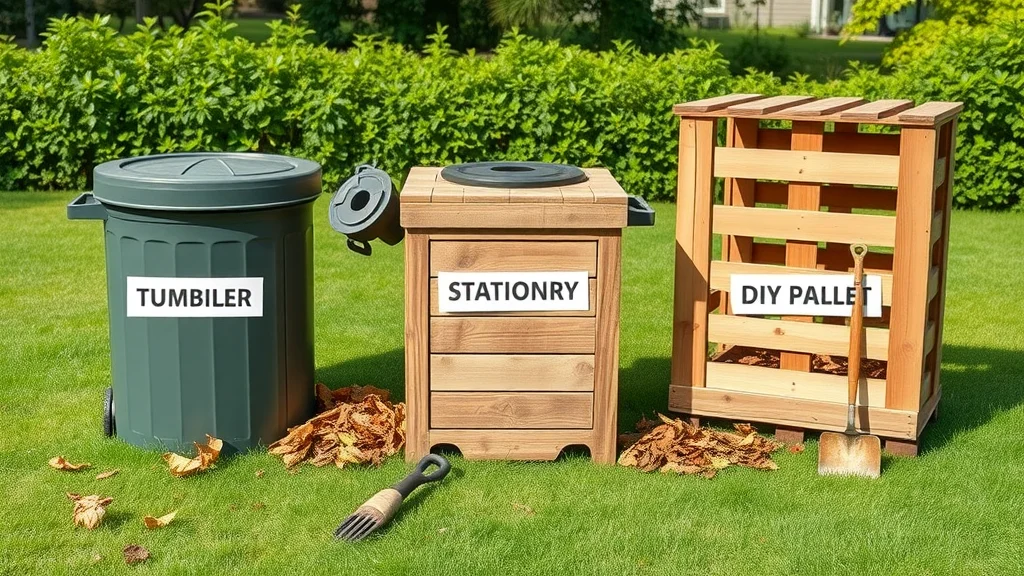
Swapping trash cans for compost bins isn't just a green lifestyle statement—it's also a practical move for homeowners who want to close the loop between their kitchens, yards, and gardens. Open bins, closed bins, tumbler models, and DIY compost systems all provide unique ways to ensure organic matter stays out of the trash, transforming what was once considered waste into a sustainable resource. By understanding how outdoor composting systems fit into your backyard—and the common pitfalls to avoid—you can create an efficient, odor-free hub that supports your plants and respects the environment.

Outdoor compost bin in lush backyard garden with homeowner adding scraps, sunlight and greenery all around

"According to the EPA, food scraps and yard waste together currently make up more than 30 percent of what we throw away – and could be composted instead."

What You’ll Learn About Outdoor Compost Bin Solutions

  • The environmental impact of a simple outdoor compost bin in a home setting

  • Key differences between compost bin types and compost bins for outdoors

  • How to choose, assemble, and maintain the best compost system for your needs

  • Evidence-based tips and tricks to maximize your composting results

  • Common pitfalls and how to avoid composting disadvantages

Outdoor Compost Bin Basics: What Every Homeowner Needs to Know

Starting your green gardening journey begins by understanding the fundamentals of composting. An outdoor compost bin is much more than just a dark container for garden waste—it's a managed system that encourages the natural breakdown of organic materials, like grass clippings and kitchen scraps. Whether you're considering a basic compost bin, a sophisticated tumbler, or a homemade wire bin, each system is designed to transform common household “waste” into a valuable soil amendment bursting with nutrients.

Key to the process are the balance and management of nitrogen-rich “green” materials (such as fresh kitchen scraps) and carbon-rich “brown” materials (like dry leaves and cardboard). The right compost system keeps these materials breaking down efficiently, with minimal effort and maximal benefit to your garden. Tools such as aeration devices, lid closures, and moisture monitors make adding and turning materials even simpler, ensuring that your backyard compost bin remains a held-together holding unit for organic material that breaks down, not a source of odors or pests.

What is a Compost Bin? A Simple Definition

A compost bin is a purpose-built container or structure designed to house organic materials—like garden waste, yard trimmings, and kitchen scraps—that decompose over time into fertile compost. These bin systems can be as straightforward as a wire bin fenced off with fence wire, or as advanced as closed bins with tumbling mechanisms for faster results. The main distinction with an outdoor compost bin lies in its ability to manage materials efficiently, contain odors, keep out wildlife, and maintain optimal conditions for the composting process. Some bins are stationary, allowing you to simply "set and forget," while others require occasional turning or layering to accelerate decomposition.

Whether choosing between an open bin, closed bin, or DIY setup, remember that the best compost bins are designed to fit your backyard size, the volume of kitchen and garden waste you generate, and any local climate considerations, particularly for keeping your compost system in place during heavy winds or storms.

Various types of outdoor compost bins on a lawn including tumbler, stationary, and DIY pallet setups

How an Outdoor Compost Bin Supports Sustainable Living

Integrating an outdoor compost bin into your backyard routine not only reduces landfill waste but also closes the loop on your home’s organic material cycle. Every kitchen scrap or handful of garden clippings that enters your compost system is a small step toward lowering greenhouse gas emissions and conserving landfill space. Composting is a pivotal practice in sustainable living, as it transforms what would be garbage into a resource that naturally enriches your soil—a true win-win.

By fostering a healthy decomposition process within your bin system, you ensure your backyard becomes a hub for climate-positive action. Better yet, homemade compost adds vital nutrients, improves soil structure, and retains moisture in your garden beds, decreasing reliance on synthetic fertilizers. As you begin composting, you'll quickly see how simple changes—like switching out trash bins for compost bins—can have a profound ripple effect in your community and local ecosystem.

Comparison of Compost System Types

Type

Ease of Use

Capacity

Maintenance

Best For

Tumbler Bins

Very easy, low turning effort

Medium

Minimal, easy aeration

Busy homeowners, small spaces

Stationary Bins

Easy, just layer materials

Large

Occasional turning

Large gardens

DIY Outdoor Compost (Pallet, Wire Bin)

Moderate, basic tools needed

Customizable

Manual management

Budget-conscious, DIYers

In-ground Units

Very easy, out of sight

Small

Nature-driven

Minimalist gardens, discreet needs

How to Build an Outdoor Compost Bin: Step-by-Step Guide

Ready to roll up your sleeves and transform kitchen scraps into garden gold? Constructing your own outdoor compost bin is affordable and deeply satisfying. Below you'll find a simple, actionable approach to creating a bin system that works for your space and needs—resulting in premium finished compost, not landfill waste. Building your own bin lets you choose durable materials, adapt size to your available yard, and control aesthetics, ensuring your compost solution is as effective as it is visually pleasing.

Whether you go for a wire bin, sturdy wooden holding unit, or plastic drum, assembling a compost bin is straightforward and teaches the valuable basics of compost management. By following the steps, you’ll ensure your composting process remains efficient and mess-free, and you’ll eliminate the guesswork behind how to structure your backyard compost pile for best results.

  1. Gather Materials for Your Compost Bin:
    Choose materials like wood pallets, fence wire, or recycled plastic. Select tools—hammer, wire cutters, power drill—as needed for assembly.

  2. Select the Ideal Location for Outdoor Compost:
    Find a flat, well-drained spot near your garden beds but away from your home for convenience and odor control.

  3. Construct the Compost System:
    Build an open bin from pallets or a closed bin from a plastic drum. Secure your structure with fence wire or sturdy screws to keep it in place during heavy winds.

  4. Fill and Maintain Your Compost Bin Properly:
    Start with a layer of coarse garden waste, then alternate greens (kitchen scraps, grass) with browns (leaves, cardboard). Water lightly and turn the pile every few weeks for even decomposition.

Watch: Video Demonstration: Building Your Own Outdoor Compost Bin (Visual Step-by-Step)

"The right compost bin can turn everyday waste into rich, garden-boosting soil in as little as a few months."

Choosing the Best Outdoor Compost Bin: Features, Benefits, and Price Breakdown

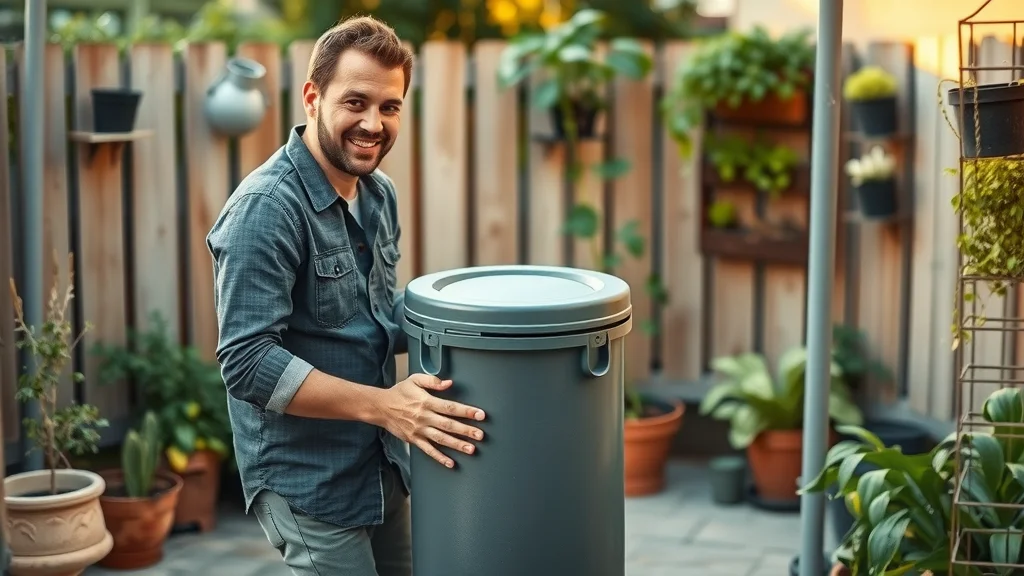
Selecting the ultimate outdoor compost bin begins with knowing what features will serve you best in your garden. Whether you’re eyeing a tumbler for quick results, a large stationary bin, or a rugged DIY solution, each compost system offers distinct benefits for different needs and budgets. Ideally, your bin will strike a perfect balance between effective composting, ease of use, and value. Let’s dig deeper into what makes a compost holding unit ideal, and how to compare compost bins for lasting satisfaction.

The three pillars to consider are durability, ease of use, and odor/aeration management. Look for outdoor composters that can withstand weather, hold ample organic matter, and boast thoughtful design features—like latching lids and aerator holes. For larger families, opt for bigger bin systems or modular units that allow easy expansion as your composting material intake grows. Understanding these differentiators ensures your investment leads to years of sustainable gardening success, without suffering the usual composting disadvantages.

What to Look for in a Quality Outdoor Compost Bin

Durability, Size, and Materials

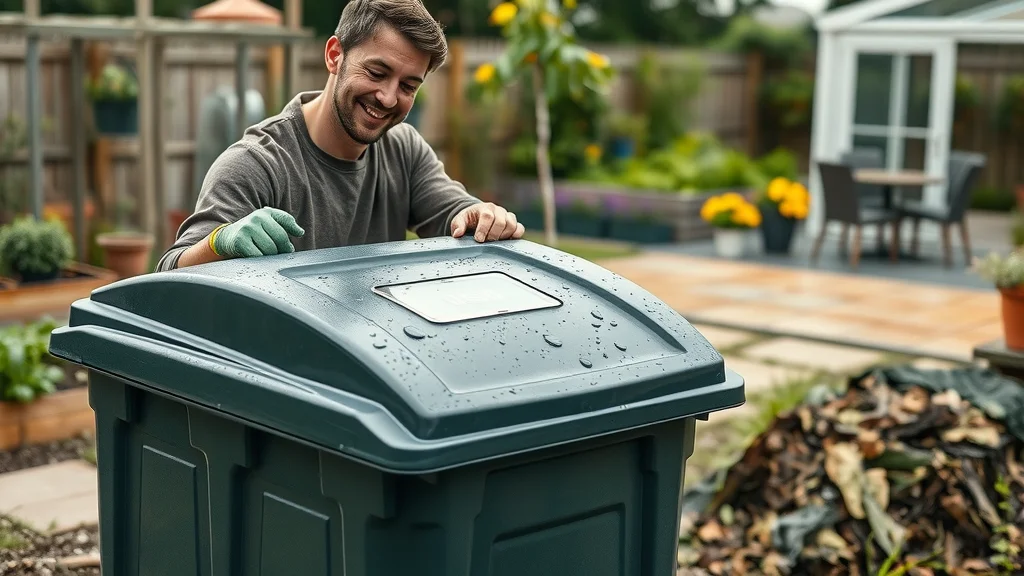
A top-tier outdoor compost bin is crafted from robust, weather-resistant materials—think thick UV-stabilized plastics or galvanized metal frames—to ensure longevity across seasons. Size matters; a bin that’s too small might get overwhelmed, while one that’s oversized may not heat up enough for efficient composting. Measure your available space and estimate your kitchen and garden waste volume before choosing. Closed bins help contain odors and pests, while open bins offer better aeration but may require more maintenance to manage moisture and wildlife. Modular systems and add-on sections also let you scale as your composting needs grow.

Sturdy modern compost bins with thick plastic and metal construction being inspected in a backyard garden

Ease of Use and Maintenance

Look for features that make adding organic material and turning your pile simple. Tumbler bins, for example, offer crank handles for effortless rotation, keeping you clean and the pile well-mixed. Stationary bins should have large openings and removable panels, allowing easy access to finished compost. Maintenance should involve minimal bending and lifting; accessible lids and levers are a plus. For pest and weather management, bins should fit tightly and lock when shut, reducing unwanted visitors while blocking excess rainwater. These small details collectively foster a positive, frustration-free composting experience for any homeowner.

Aeration and Odor Control in Compost Systems

Great compost systems delicately balance airflow and moisture. Proper aeration—provided by either built-in vents, manually turning the pile, or the presence of a wire bin design—speeds up the composting process and controls unpleasant odors. Insufficient oxygen leads to anaerobic (bad-smelling) decomposition, so seek compost bins with ample holes for ventilation, or designs that support easy manual aeration. Pair this with strategic layering of green and brown materials, and you’ll stay ahead of both stinky odors and slow decomposition. Closed bins are especially good at containing smells, while open bins require a little more mindfulness and hands-on care for best results.

Top-Rated Compost Bins Compared: Price, Pros, and Cons

Model/Type

Price

Capacity

Pros

Cons

ComposTumbler 37 gal

$150-200

Medium

Easy to turn, fast results, odor-controlled

Higher initial cost, needs assembly

Stationary EcoBin 110 gal

$80-120

Large

High volume, weatherproof, simple use

Manual turning, takes up space

DIY Pallet Bin System

$25-50

Custom

Low cost, scalable, reuses materials

DIY skills required, less contained

In-ground Composting Tube

$20-40

Small

Discreet, low maintenance

Slow, limited input size

Subtle Buying Guide: Finding the Right Compost Bin for Your Home

Every garden and homeowner has unique needs—so use this buying guide to match your space, budget, and sustainability goals to the best outdoor compost bin. If you have a small city backyard, a compact tumbler or in-ground system keeps things neat without sacrificing output. For larger families or serious gardeners, larger stationary bins or modular bin systems allow you to process more organic material fast, while still keeping pests out. DIYers will enjoy crafting pallet or wire bins, personalizing their bins’ look and size at a fraction of the cost. Green thumbs eager to maximize eco-friendly impact should seek compost bins made from recycled materials or designed for closed-loop sustainability.

Top features to weigh include capacity, construction strength, lid/floor design, and aeration. When reading reviews or comparing products, look for praise of simple operation, longevity, and minimal odor issues. Don’t forget to factor in price: some systems pay off with time-saving convenience, while others excel in budget-friendliness but require more hands-on effort. Whatever your choice, the result is the same: less landfill waste and a thriving, sustainable backyard ecosystem.

  • Best for Small Backyards: Compact tumbler bins or in-ground tubes

  • Most Eco-Friendly Option: Recycled plastic or upcycled DIY pallet bins

  • Best Budget Outdoor Compost Bin: DIY wire bins or wooden pallet systems

  • Compost Systems for Large Families: Oversized stationary bins or modular holding unit setups

Urban backyard with small compost tumbler, gardener spinning the bin near pots and herb garden

Watch:

People Also Ask: Outdoor Compost Bin Essentials

How often should I pee on compost?

Human urine can be a valuable “green” nitrogen source in the composting process, but moderation is key. If you opt to add urine to your outdoor compost bin, do so once every one to two weeks, making sure to balance with plenty of carbon-rich materials like dry leaves or cardboard. This will support healthy, rapid decomposition without creating odors or imbalanced moisture levels. Always avoid peeing directly on a compost pile if you're using it for food crops, and never allow pets or others to misuse the compost system. Cleanliness and proper dilution are essential—repeat sparingly for best results.

What are 5 disadvantages of composting?

Composting offers many benefits, but there are a handful of common disadvantages to consider: (1) Potential for unpleasant odors if your compost system isn't well-aerated; (2) Attraction of pests (rodents, flies) if food scraps are improperly managed in open bins; (3) The need for regular maintenance—turning, moisture checks—to ensure successful breakdown of materials; (4) Requires outdoor space, which isn’t always available to urban dwellers; and (5) Time to see results, as even efficient compost bins can take several months for materials to become finished compost. With informed upkeep and thoughtful bin design, most of these issues can be minimized or completely avoided.

What is the first rule of composting?

The first rule of composting is to maintain the correct balance of greens (moist, nitrogen-rich organic matter like kitchen scraps and grass clippings) and browns (dry, carbon-rich items like leaves or cardboard). This ensures proper decomposition, prevents odors, and helps beneficial microorganisms thrive. A well-balanced compost bin supports a healthy, rapid composting process and produces high-quality soil amendment for your garden beds. Remember: if in doubt, add more browns to manage moisture and odor, and always avoid composting meat, dairy, or oily foods in outdoor bins.

How to make an outdoor compost bin?

Building your own outdoor compost bin is simple: gather sturdy materials like repurposed wood pallets or sturdy fence wire, form a cube or cylinder shape, secure all sides, and position the unit on soil in a convenient garden spot. Start the composting process by layering greens and browns, sprinkle with water if dry, and turn regularly for aeration. You’ll soon have a functional bin system transforming kitchen and garden waste into valuable finished compost, all for a fraction of the price of commercial models.

Top Tips for Maintaining Your Outdoor Compost Bin All Year Round

  • Monitor moisture and aeration in your compost system: Keep materials damp but not soaked, turn the pile often for oxygen.

  • Layer materials strategically: Alternate green and brown inputs to maintain the right decomposition balance.

  • Harvest finished compost regularly: Every few months, scoop out finished compost from the bottom or removable panel.

  • Troubleshoot common compost bin problems: Manage odors by maintaining airflow, deter pests by burying food scraps, and address soggy piles by adding more dry materials.

Gardener checking compost moisture in outdoor bin with thermometer and water spray under autumn pergola

"A well-managed outdoor compost bin not only nourishes your garden but also reduces landfill waste – and that’s a win for everyone."

Key Takeaways on Outdoor Compost Bin Solutions for Every Homeowner

  • Outdoor compost bin benefits extend far beyond simple waste reduction

  • Choosing the right compost system is key for long-term success

  • Regular maintenance leads to rich, garden-ready compost

Frequently Asked Questions (FAQs) on Outdoor Compost Bins

  • Can an outdoor compost bin smell bad?
    If managed properly—layering greens and browns, regular aeration, and avoiding meats/dairy—outdoor compost bins should not smell unpleasant. Odors tend to indicate too much wet material or not enough airflow.

  • How long does it take to get usable compost?
    With an active compost system and proper care, you can expect finished compost in three to six months. Factors like temperature, material size, and the frequency of turning or aerating all impact speed.

  • Should I buy compost bins or build my own?
    Buying is convenient and comes with features like built-in aeration. Building your own bin saves money and lets you size and style it exactly how you want. Both options can work well—choose based on your budget, time, and DIY comfort level.

  • What can’t go in an outdoor compost system?
    Avoid meat, dairy, oily foods, and heavily coated papers. Stick to organic yard waste, fruit/vegetable scraps, eggshells, coffee grounds, and paper products without heavy inks or chemicals for safe, fast decomposition.

Ready to Transform Your Backyard? Explore More Green Gardening Tips

Your outdoor compost bin is more than a waste solution—it's the heart of a thriving, eco-friendly backyard. Stay current with more inspiring gardening guides and sustainability hacks at luxurylandscaping.space!

Family with lush, flourishing backyard garden and outdoor compost bin, radiant flowers and vibrant greenery

Ready to start composting? Choose your bin, follow these hacks, and turn your backyard into a powerhouse of sustainability and growth in just one season!

To enhance your understanding of outdoor compost bins and their benefits, consider exploring the following resources:

  • “Build Your Own Outdoor Compost Bin”: This guide provides a cost-effective method to construct a compost bin using welded wire fencing, offering step-by-step instructions suitable for DIY enthusiasts. (boston.gov)

  • “Outdoor Composting Guide”: Published by the NYC Department of Sanitation, this comprehensive guide covers the essentials of setting up and maintaining an outdoor compost bin, tailored for urban environments. (nyc.gov)

Various types of outdoor compost bins on a lawn including tumbler, stationary, and DIY pallet setups
Product Reviews

6 Views

0 Comments

Write A Comment

*
*
Related Posts All Posts
12.05.2025

Craft Holiday Cheer: DIY Wreath Magic

Did you know that more than 75% of holiday decorators now prefer using a diy wreath kit over store-bought wreaths? This trend is no accident: homeowners are discovering that these kits offer not just savings, but endless opportunities for joyful, personalized decor. If you’re curious how to transform your home with a beautiful wreath while keeping it fun and budget-friendly, you’re in the right place. Get ready for a hands-on journey where creativity and convenience make your holidays shine! Did You Know? Over 75% of DIY Holiday Decorators Prefer a DIY Wreath Kit Holiday decorating isn’t just about making your space look festive—it’s about enjoying the process, expressing yourself, and creating memories. With the soaring popularity of diy wreath kits, more homeowners are opting for these fun, all-in-one solutions. Why? A wreath kit streamlines the crafting process, removing the guesswork and providing all the essential materials you need for professional-looking results. By utilizing a kit, you also save precious time to focus on what matters most—celebrating with loved ones. Whether you’re decking your front door or searching for that perfect centerpiece, a wreath kit enables both experienced crafters and complete beginners to make a beautiful wreath. Plus, with features like free shipping, it’s never been easier to have everything you need delivered right to your door, ready for instant creativity. This guide will help you discover why DIY kits are leading the way and how you can join the movement for a more memorable, cost-effective, and joyful holiday. "Save time and money, while expressing your creativity—discover why a DIY wreath kit is the homeowner’s decorating secret." What You'll Learn in This DIY Wreath Kit Guide How to choose the best diy wreath kit for your style Step-by-step diy wreath making instructions Top tips for long-lasting wreath results Updates on free shipping and top-rated kits Why a DIY Wreath Kit is the Perfect Solution for Holiday Decorating The transformation of your home for the holidays should be exciting—not overwhelming. The diy wreath kit stands out as the ultimate decorating solution, offering a blend of convenience, savings, and personalized charm. Unlike traditional store-bought wreaths that often come with a higher regular price and a one-size-fits-all look, a crafted design from a wreath kit is uniquely yours. With free shipping widely available for top-rated kits, it’s easy and affordable to begin your wreath making journey. What’s more, diy wreath kits are designed with simplicity and quality in mind, ensuring that even first-timers can confidently achieve professional-looking results. They come complete with all the wreath making supplies—lush greens, ribbons, decorative accents, and a sturdy wreath frame. Imagine the pride in hanging a beautiful wreath you crafted yourself, knowing it reflects your personality and creativity. For homeowners who crave a blend of style, savings, and fun, these kits make holiday decorating a breeze. DIY Wreath Kit vs Traditional Wreaths: Save Money Without Sacrificing Quality Financial benefits of a diy wreath kit: By choosing a wreath kit, you typically pay less than the regular price of a pre-made wreath. Plus, many kits offer free shipping on orders, stretching your budget even further and providing outstanding value for homeowners looking to decorate multiple areas. Customizability and personal flair: With diy wreath kits, you aren’t locked into a predetermined design. Add your personal touch—perhaps create a beautiful wreath for Memorial Day or an adorable easter wreath for spring. These options let you style your space for every season or special occasion, including Fourth of July, with patriotic wreath designs available in select kits. Convenience and stress reduction: With everything included in the box and clear instructions, you can begin your wreath making project the moment your kit arrives. No need to source individual wreath making supplies or hunt for the right decorative accents—making your holidays more enjoyable and hassle-free. Types of DIY Wreath Kits: From Pancake Wreath to Patriotic Wreaths Pancake wreath kit essentials: These thin, space-saving designs are perfect for front doors and often incorporate lush materials without the bulk. Pancake wreath kits are especially popular for those seeking a modern twist on tradition. Patriotic wreath options: Want to celebrate the Fourth of July or Memorial Day? Patriotic wreath kits often feature bold reds, whites, and blues, making them ideal for summer celebrations and honoring special occasions throughout the year. Seasonal and everyday diy wreath kits: From adorable easter wreaths to rustic autumn designs or elegant winter greens, there is a wreath kit for every taste and holiday. Many top kits even let you refresh your creation for each season by swapping out decorative elements. Essential Features to Look For in a Wreath Kit Quality materials for diy wreath kits: Look for kits that feature rich, long-lasting greenery, durable frames, and vibrant decorative accents. Top-reviewed kits often stand out thanks to their ultra-realistic faux greens and weather-resistant ribbons, ensuring your beautiful wreath remains fresh-looking for weeks. Instructions and support for easy wreath making: The best diy wreath kits include detailed instructions, video tutorial access, or even customer support to help you make a wreath without guesswork. Whether you’re a seasoned crafter or a beginner, clear guidance is key for creative confidence. Free shipping options on top kits: Free shipping on orders is a favorite among savvy shoppers and a frequent perk from companies we love. This makes it easy and affordable to order from online retailers, especially when you want to make a purchase for gifting or multiple doors around your home. Step-by-Step: How to Make a Wreath Using Your DIY Wreath Kit StepAction 1Unbox and organize your diy wreath kit 2Prep your base for wreath making 3Attach foliage and decorative elements 4Final touches: personalize your diy wreath 5Hang and enjoy your custom wreath To create a stunning diy wreath, start by unboxing your kit and laying out all the wreath making supplies. Read the included instructions thoroughly—these will walk you through prepping your wreath frame, arranging greenery, and layering on ribbons and accents for a professional result. It’s helpful to test your design arrangement before securing everything in place. Add unique items, such as seasonal ornaments or special embellishments, to make a small or statement piece that fits your decor. Hang your completed work on a door, mantle, or wall and enjoy a burst of customized cheer every day of the season! Get inspired by watching a step-by-step DIY wreath kit unboxing and assembly video, filmed in a cozy home environment. See how to easily create a beautiful wreath from scratch, and follow along as each step is demonstrated in detail, highlighting the simplicity and fun of diy wreath making. Where to Buy the Best DIY Wreath Kit Online stores with top wreath kit selections: Numerous retailers offer highly rated diy wreath kits online. Look for shops where you can easily browse, compare, and read total reviews on the best-selling products. Many sites provide regular price discounts and affiliate links for companies we love, so you always get the best deal. Availability of wreath kits at Tractor Supply and others: Popular retailers like Tractor Supply frequently stock not only finished wreaths but also trending diy wreath kits around major holidays. Visit your local store or check online for a seasonal selection that includes both patriotic wreaths and adorable easter wreaths. Comparison of prices and free shipping deals: When shopping, consider free shipping on orders and loyalty perks for new kits. Some shops run seasonal promotions or offer bonus materials, so keep an eye out for the best value—sometimes you can make a small commission by using affiliate links for companies we love, or take advantage of special bundles for memorable decorating at home. DIY Wreath Kit Reviews: Real Homeowners Share Their Wreath Making Experiences "My first diy wreath kit made holiday decorating effortless, and everyone loved my creation!" — Emily R., Homeowner Customers rave about the ease and satisfaction that comes with a diy wreath kit. Many report that assembly was simple thanks to detailed, step-by-step video tutorials or printed guides. Whether crafting an adorable easter wreath or a bold patriotic wreath, reviewers highlight the quality of materials and the joy of personalizing their décor. Families appreciate that diy wreath kits turn decorating into a memory-making event that’s both budget-friendly and fulfilling. Fellow homeowners note that they often return for new designs each season, benefiting from regular price drops and free shipping on orders. Others find peace of mind in knowing their purchase supports companies we love, and some even say their beautiful wreaths inspired neighbors to try kit-based wreath making themselves. If you’re looking for a proven way to refresh your home, reading total reviews and learning from real user experiences is the smartest way to make a purchase with confidence. FAQs: Everything You Need to Know About DIY Wreath Kits Is it cheaper to buy or make a wreath? Generally, creating a wreath with a diy wreath kit is more cost-effective and provides better customization than purchasing a pre-made option. Kits combine all essential materials at a fair regular price, especially when free shipping is included, and offer superior personalization compared to generic store-bought designs. Many homeowners find making their own wreath is the best value for both wallet and creativity. Are there DIY wreath making kits? Yes, multiple diy wreath making kit options are available online, catering to all skill levels and seasonal themes. Whether you want to make a small decorative wreath, a bold patriotic wreath, or an adorable easter wreath, you’ll find kits with step-by-step video tutorials and instructions widely available on reputable craft and home décor websites. Does Tractor Supply have wreaths? Tractor Supply often stocks both finished wreaths and popular diy wreath kits, especially during the holiday season. Shoppers can typically find products for every major occasion, including Memorial Day and the Fourth of July, often with competitive prices and free shipping on orders. How do I make my own wreath step by step? Simply follow the instructions included in your diy wreath kit—typically, you’ll attach base materials to your wreath frame, add decorative elements such as ribbons and holiday accents, and finish with personal touches. Most modern diy wreath kits provide everything needed for assembly, and using a video tutorial can make wreath making a fun project for all ages. Key Takeaways: Get Creative with a DIY Wreath Kit A diy wreath kit empowers homeowners to create stylish, affordable decor. Personalization, free shipping, and easy assembly make them a favorite holiday choice. Unlock pro-level wreath making skills with a short tips video. Discover expert hacks for arranging materials, achieving long-lasting designs, and putting the finishing touch on your next beautiful wreath—all with materials included in your favorite diy wreath kits. Make Your Holidays Shine: Explore Top DIY Wreath Kit Trends for 2024 Stay current with https://luxurylandscaping.space/ for the latest on diy wreath kits, exclusive reviews, and inspiration to elevate your holiday décor. Ready to craft joyful memories? With a diy wreath kit, you’ll enjoy stylish savings and personalized decor—all at your fingertips! Creating your own holiday wreath can be both enjoyable and rewarding. To assist you in this endeavor, here are some top-rated DIY wreath kits: Bloom DIY Wreath Kit This kit includes a grapevine wreath base, fresh-cut greens, wire, and access to a video tutorial. Optional accessories like dried flowers and pine cones are available. Delivery is $15 within the regular delivery area. (bloomsubscription.com) Karols Krafts & Signs DIY Wreath Kits Offering a variety of themed kits, each includes coordinated ribbons, mesh, signs, and frames. Suitable for both beginners and seasoned crafters. (karolskraftssigns.com) Piper Mountain DIY Wreath Kit Features fresh Balsam Fir evergreens from Maine, a unique wreath ring, classic decorations like a pre-tied red bow, pinecones, and faux red berries. Includes printed instructions and a video demonstration. (pipermtn.com) Blooms & Evergreen DIY Luxury Wreath-Making Kit Contains premium, sustainably sourced foliage and floristry materials, including fresh and dried flowers, a choice of wreath base, ribbon, dried fruits, and necessary tools. Comes with a step-by-step guide and instructional video. (bloomsandevergreen.com) Figs & Ginger Everlasting Wreath-Making Kit Designed for creating natural, dried flower wreaths, this kit includes three 4” wreath bases, custom paddle wires, a wooden quote plaque, and a selection of dried florals. Ideal for both experienced crafters and beginners. (figsandginger.com) These kits provide all the materials and guidance needed to craft a beautiful, personalized wreath for your home.

12.05.2025

Grip Through Frost: Best Gloves for Gardeners

Did you know that over 60% of gardeners avoid winter tasks because their gloves just can’t stand up to the cold? If you’ve ever found yourself staring at a frost-covered flower bed dreading the chill, you’re not alone. The right cold weather garden gloves aren’t just a comfort—they’re a game-changer. In this comprehensive guide, you’ll unlock expert reviews, learn how to choose the best gloves, and discover why the right pair helps your green thumb flourish all winter long. A Surprising Truth: How Cold Weather Impacts Your Gardening Experience "Studies show that over 60% of gardeners avoid winter tasks due to discomfort from inadequate gloves." Winter transforms the garden into a sparkling spectacle but also brings unique challenges for gardeners. Bitter temperatures, biting wind, and frosty mornings don’t just freeze the soil—they can quickly freeze motivation. Without the right protection, your hands become stiff and numb, making it tough to grip even the sturdiest garden gloves while tackling essential work. Cold weather garden gloves become more than just accessories; they’re vital tools that shield, warm, and empower gardeners to conquer winter’s harshest conditions. Not only does cold sap dexterity, but using inadequate or worn-out gloves risks blisters, cracked skin, and even frostbite during longer sessions. As the statistic above reveals, most gardeners end up skipping winter chores, leading to overgrowth or missed planting opportunities. Choosing gloves with specialized insulation, firm grip textures, and water-resistant materials keeps your hands warm and agile. This advantage allows for uninterrupted work, ultimately improving your garden’s health and appearance, even when temperatures drop below freezing. What You'll Learn: Choosing the Best Cold Weather Garden Gloves The key features of cold weather garden gloves and how they differ from regular gardening gloves How to match a work glove to your garden tasks in cold weather conditions Why firm grip and water resistant qualities matter How to select the right size and fit using a glove size chart Top picks and best-reviewed cold weather garden gloves to consider Essential Features of Cold Weather Garden Gloves: From Firm Grip to Mesh Back When shopping for the best cold weather garden gloves, it’s crucial to assess the materials and technologies that differentiate a true winter glove from a standard gardening glove. Key innovations include latex coated and leather gloves, both prized for their resilience and protection in harsh conditions. Latex coated gloves offer slick resistance to wetness and provide a superior grip glove effect, locking out moisture so your hands stay warm and dry. Meanwhile, supple leather gloves mold perfectly over time and withstand thorns, heavy tools, and abrasive surfaces, making them a top pick for tough winter projects. Newer designs highlight the benefits of a mesh back, which permits some breathability without sacrificing insulation. This ensures sweat doesn't chill your skin and the heat remains contained within the glove. Other must-have traits include water resistant coverings for dewy mornings or snowy afternoons, as well as advanced grip technologies—like textured palms or multi-layer coatings—to keep tools firmly in hand. Ultimately, innovations in winter garden glove technology let you dig, weed, and plant with confidence, no matter how frigid the forecast. Understanding cold weather materials: latex coated, leather gloves, and coated gloves Benefits of mesh back, water resistant, and grip glove technologies Keeping your hands warm: innovations for winter gardening Top Picks for Gardening Gloves: Our Best Cold Weather Garden Gloves Reviewed Finding your perfect cold weather garden gloves starts with expert recommendations and hands-on reviews. Each glove style brings its own blend of protection, comfort, and durability to winter gardening. The following list features options praised for their practicality, resilience, and thoughtful design—endorsed by seasoned gardeners braving cold climates every day. Each top pick blends insulation with firm grip technologies to keep your hands protected through every frosty task. Vermont Glove Work Glove: Premium all-around protection, sturdy leather gloves with thermal lining. These gloves deliver true warmth without loss of dexterity on subzero mornings. Latex Coated Garden Gloves: Enhanced grip glove for frosty mornings. Water-resistant and flexible, they secure tools even when ice forms on handles. Firm Grip Cold Weather Gardening Gloves: Water resistant and thermal lined for maintaining warm and dry hands throughout tough winter chores. An affordable workhorse for daily use. Leather Gloves for Gardeners: Durable comfort in cold climates. Perfect choice for tasks like pruning rose thorns or hauling firewood—long-lasting and robust. Amazing Stuff for Winter Gardeners: These lesser-known favorites mix unique materials and inventive features, such as elastic around the wrist or extra-furry linings, for customized cold-weather resilience. Video Review: Comparing Top Cold Weather Garden Gloves in Real Conditions See how each work glove stands up to real-life frosty challenges in our hands-on video. Watch gardeners test latex coated and leather gloves, run small and large sizes, and demonstrate the performance of firm grip gloves with visible condensation and practical tool use. Notice the difference in warmth, dexterity, and grip as each pair faces snow, wet soil, and icy handles. Selecting the Perfect Fit: Cold Weather Garden Glove Size Chart and Fit Guide Choosing the correct glove size is essential for both comfort and performance. Gloves that run small can restrict movement and circulation, while oversized pairs can hamper your firm grip and lead to blisters. Referencing a complete size chart simplifies the process. Pay close attention to your hand size—measure both the palm circumference and finger length. Brands like Vermont Glove, Firm Grip, and various coated gloves differ in sizing, so a chart helps you match glove to need for everything from delicate seed planting to hauling heavy planters. Below is a handy comparison table. When selecting your next pair of cold weather garden gloves, always try on size small, medium, or large, as brands can vary and the right fit means better protection and warmth. Choosing wisely now means less hassle—and warmer, more nimble fingers—down the road. Brand Glove Size Material Water Resistance Grip Technology Vermont Glove S–XL Leather Moderate Firm Grip Firm Grip S–XXL Latex Coated High Grip Glove Generic Mesh M–XL Mesh Back Low Latex Coated Video Demonstration: How to Measure Your Hand for a Perfect Glove Size Watch our video to learn how hand size impacts glove selection. We demonstrate measurement methods using a tape measure, show where to find fit info on packaging, and offer practical advice for choosing the right work glove for every task—especially in cold weather. Understanding glove size helps you find a cozy fit that won’t slip or constrict, ramping up both comfort and safety. Price vs. Performance: Are Premium Cold Weather Garden Gloves Worth It? At first glance, it’s tempting to grab a pair of gloves from the nearest sale bin. But when facing biting winds and heavy garden work, you quickly see the difference. Cheap gloves rarely last—investing in a quality pair means safer, warmer hands and fewer replacements. Premium gloves not only shield your hands from the elements; they also stand up to sharper thorns, repeated washing, and the rigors of freezing weather. The up-front cost of leather gloves or top-rated firm grip gloves may feel steep, but the return is long-lasting protection and fewer interrupted garden sessions. Latex coated and water resistant options offer the added benefit of staying warm and dry when snow and rain threaten progress. The final verdict: a higher quality garden glove isn’t just a splurge—it’s an investment in your winter productivity and safety. "Cheap gloves rarely last—investing in a quality pair means safer, warmer hands and fewer replacements." People Also Ask About Cold Weather Garden Gloves What are the best cold weather garden gloves for women? Answer: Many brands offer cold weather garden gloves in smaller sizes tailored for women, such as Vermont Glove and Firm Grip, featuring flexible materials and ergonomic design for a snug fit. How do I keep my hands warm while gardening in the winter? Answer: The best way to keep hands warm is to use insulated, water-resistant cold weather garden gloves with features like thermal lining, mesh back for breathability, and a tight wrist closure to keep out cold air. Can you use leather gloves for cold weather gardening? Answer: Yes, high-quality leather gloves can be excellent cold weather garden gloves when they have insulation or are paired with a liner; they provide both durability and warmth. Expert Tips: Maintaining and Caring for Your Cold Weather Garden Gloves Washing and drying recommendations for latex coated and leather gloves How to restore firm grip after heavy use Storage tips for prolonging glove life during off-seasons Proper care can add seasons to even the best cold weather garden gloves. For latex coated gloves, hand wash gently in lukewarm water with mild detergent, then air-dry away from direct heat—too much can lead to cracking. Leather gloves benefit from a wipe-down with a damp cloth, and occasional conditioning with leather balm restores suppleness. After each session, shake out debris and let your work glove dry fully to prevent mildew. When storing for winter, avoid packing away while damp and seek cool, dry spaces to maintain fit and longevity. For grip glove surfaces, lightly scrub with a soft brush to restore traction after heavy tasks. FAQs: Everything You Need to Know About Cold Weather Garden Gloves Are water resistant gloves truly waterproof? Most water resistant gloves resist light moisture but may become saturated in prolonged heavy rain. Consider waterproof ratings and reviews for severe conditions. How do I know if my gloves are suited for extreme cold? Look for layers like fleece or thermal lining, plus tight wrist closures or elastic around the wrist. Try them out with tasks in your typical winter weather before committing. Do mesh back gloves work in freezing weather? A mesh back glove is ideal when breathability is needed but may not be sufficient for deep frost. Use mesh back styles in milder climates or layer with a liner for added insulation. Key Takeaways: Choosing Your Ideal Cold Weather Garden Glove Select gloves that balance insulation, grip, and fit for cold weather Premium materials like leather and water resistant coatings boost gardening glove longevity Don’t compromise on a proper size—use a size chart and consider your gardening glove needs Final Thoughts: Gear Up for Winter—Find Your Perfect Cold Weather Garden Gloves Stay current with https://luxurylandscaping.space/ for the latest gardening gear reviews, tips, and winter solutions. To enhance your understanding of cold weather garden gloves, consider exploring the following resources: “Best gardening gloves in 2025: Tested and rated”: This comprehensive guide from Tom’s Guide reviews the best gardening gloves available for 2025 through hands-on testing. Experts evaluated various gloves based on comfort, durability, grip, water-resistance, dexterity, and suitability for specific gardening tasks such as pruning, transplanting, and heavy-duty yard work. (tomsguide.com) “Niwaki Winter Gloves”: These fleece-lined and rubber-coated gloves are designed for cold weather gardening tasks, offering warmth and dryness. They are available in various sizes and feature bright colors for easy visibility. (niwaki.com) If you’re serious about maintaining your garden during the colder months, these resources will provide valuable insights and options to keep your hands protected and comfortable.

12.04.2025

Light Up Winter Nights: Patio Glow Ideas

Did you know? Homeowners who use outdoor patio string lights in winter report spending up to 40% more evenings outdoors during cold months—turning drab, dark patios into lively, welcoming spaces for friends and family. In this article, explore inspiring ideas, practical advice, and unique styles for making your patio the ultimate retreat, even as temperatures drop. A Bright Start: Surprising Facts About Outdoor Patio String Lights Most people associate outdoor string lights only with summer parties, but their benefits stretch far beyond those warm months. Outdoor patio string lights are designed for year-round charm and resilience, lighting up even the frostiest nights. Did you know that innovations in LED and solar string lights now offer not just brilliance but also remarkable energy savings? Some modern patio string lights use up to 80% less energy compared to traditional incandescent bulbs, a win for both your wallet and the planet. What’s more, high-quality string lights are crafted to withstand snow, rain, and rigid winter winds, ensuring safety and style even when the temperature plunges. Lighting professionals agree that adding string lighting is the quickest way to boost curb appeal while also increasing usable outdoor space during winter. Whether it’s for cozy gatherings, festive celebrations, or simply unwinding beneath a golden glow, outdoor patio lights transform ordinary spaces into magical winter escapes. Homeowners are increasingly looking at lighting not just as a seasonal accessory but as a permanent upgrade for their patios, decks, and gardens—highlighting the growing popularity of patio string lights as essentials rather than extras. Why string lights are a four-season solution—not just for summer The latest energy-efficient trends transforming outdoor spaces Top features to look for when shopping for patio string lights Step-by-step installation for wintery patios Expert and user reviews of the best outdoor string lighting brands Safety and layout tips for lasting, enjoyable results Choosing the Best Outdoor Patio String Lights for Your Space With the explosion of options—mini lights, globe lights, icicle lights, vintage-style Edison bulbs, and even solar string lights—selecting the right outdoor patio string lights can feel overwhelming. Each set of string lights isn’t just about aesthetics; it delivers different practical benefits. Some offer extended connectability for sprawling patios, while others are built for high weather resistance, perfect for winter’s harshest elements. The best models blend form with function, prioritizing both ambiance and reliable outdoor performance. When browsing patio string lights, consider your outdoor space’s size, exposure to the elements, and the desired mood. For instance, LED outdoor string lights are both energy-efficient and remarkably bright, making them ideal for large gatherings or security. Meanwhile, solar string lights provide a green, wire-free option that’s perfect for eco-conscious homeowners or those with limited access to outlets. Think about whether you want your patio to twinkle with the charm of mini lights or exude a warm, vintage glow with larger, globe-shaped bulbs. Installation considerations also play a role; make sure your choice allows for easy hanging, customizable spacing, and secure mounting. Top Features to Consider When Shopping String Light Options Weather resistance — Choose lights rated for outdoor use and capable of withstanding rain, snow, and wind. Energy efficiency — Opt for LED or solar string light options for maximum savings. Brightness levels — Look for adjustable features to match your mood or occasion, from ambient glow to full illumination. Length and connectability — Ensure your set covers your desired area, with options to link multiple strings seamlessly. Installation ease — Pick lights that come with mounting hardware, flexible spacing, and straightforward instructions. “Outdoor patio string lights can transform a cold evening into a warm gathering spot — the right set is more than ambiance; it’s peace of mind during winter’s longest nights.” Comparison of Popular Outdoor Patio String Lights Models Brand Top Features Price Range Customer Rating Weather Resistance Warranty Enbrighten LED, shatterproof, connectable up to 150ft $45–$85 4.8/5 Extreme (IP65) 3 years Brightech Solar, energy-efficient, Edison bulbs $35–$70 4.7/5 High (IP44) 2 years Hampton Bay Classic string lights, multiple color temperatures $28–$75 4.5/5 Moderate (IP43) 1 year Brightown LED, dimmable, easy installation $32–$55 4.4/5 High (IP44) 6 months Outdoor Patio String Lights Installation: Tips, Layouts, and Safety Properly installed outdoor string lights don’t just look great—they also ensure your family’s safety. Thoughtful layout and secure mounting are especially important in winter, when icy surfaces and precipitation can pose risks. Before you begin, evaluate your patio or deck: locate anchor points such as trees, beams, or fences, and make note of distances, ensuring you have enough length for your chosen light string. Planning your light path in advance not only streamlines the process but also helps avoid surprises when hanging patio lights in cold weather. Remember: Connect only as many light strings as your manufacturer recommends, use weatherproof extension cords, and keep all plugs and outlets protected from moisture. Modern string lights often come with comprehensive installation kits, but extra clips or hooks can add stability—especially during winter storms. If you’re lighting a larger space or planning frequent outdoor parties, consider commercial-grade patio string lights built for long-term exposure and consistent brightness. Step-by-Step Guide: How to String Outdoor String Lights Across Your Patio Measure your patio or outdoor space: Use a tape measure to calculate your lighting route, accounting for zig-zags, curves, or straight runs. Select sturdy anchor points: Outdoor-rated poles, pergola beams, or fence posts work best. For added security, drive support hooks or use existing structures. Lay out your string lighting on the ground first: This ensures proper length and arrangement—avoid tangles and uneven distribution. Install mounting hardware: Attach your chosen clips, hooks, or cable guides securely along your planned path. Hang patio lights: Working from one end, string the lights along the hardware, checking as you go for tautness and height consistency. Plug in and check connections: Use only outdoor-rated plugs and extension cords. Protect electrical points with waterproof covers. Test and adjust: Step back and confirm that string lights are balanced and secure, rearranging bulbs or tightening as needed. Safety Considerations for Outdoor String Light Installation Safety should always come first when installing outdoor patio string lights. Ensure all lights and extension cords are rated for outdoor use to resist moisture and icy conditions. Avoid setting light strings in areas prone to standing water or deep snow, and use insulated gloves when working outdoors in cold weather. All mounting hardware should be sturdy enough to handle winter winds or the weight of snow, especially if using heavier globe lights or icicle light designs. Always follow the manufacturer’s guidelines for connecting multiple sets to avoid overloading circuits. For solar string light models, be mindful of winter sun angles—maximize energy by placing solar panels in the brightest, most unobstructed location. Finally, regularly inspect your installation for any loose bulbs or exposed wiring, especially after winter storms, to maintain both safety and the enchanting glow that makes your patio a winter haven. Real Reviews and Experiences: Best Outdoor Patio String Lights Brands Nothing inspires confidence like real-world results. Homeowners consistently praise brands like Enbrighten, Brightech, and Hampton Bay for their performance in winter conditions, calling out features like all-weather casings, warm brightness, and easy installation. “We thought string lights were only for summer parties,” one satisfied customer shared, “but our Brightech solar string lights lit up our deck through January snow and icy rain!” Permanent outdoor string light options, like those from Enbrighten, are especially popular for their plug-and-stay durability, making them an investment that lasts season after season. Many homeowners use a mix of globe lights for ambiance and mini lights for pathways or fences, transforming their outdoor spaces into magical retreats. The reviews highlight not only the style upgrade brought by patio string lights but also the emotional impact—families gather more often, and outdoor parties feel special year-round. Who Makes the Best Permanent Outdoor Patio String Lights? Top-rated brands such as Enbrighten, Brightech, and Hampton Bay offer market-leading permanent outdoor string lights. These lights are renowned for their ultra-durable materials, shatterproof bulbs, and long warranties—traits that matter when you want a “set it and forget it” solution for all seasons. Many reviewers point to Enbrighten’s commercial-strength build and Brightech’s solar efficiency as standout reasons for their loyalty, while Hampton Bay is celebrated for providing stylish, affordable options suited to both classic and modern patios. Visual Inspiration: Creative Ways to Use Outdoor Patio String Lights in Winter Pro tip: Hang patio lights along retaining walls, drape them over pergolas, or weave through winter greenery to create a stunning, layered glow for holiday gatherings, outdoor parties, or quiet nightcaps. People Also Ask: Outdoor Patio String Lights FAQs What are the best outdoor string lights? Answer: Factors such as durability, weather resistance, and bulb type play a major role in determining the best outdoor string lights, with leading models noted for their versatility and longevity. The best outdoor string lights are those that stand up to your local climate, offer flexible installation, and create the ambiance you want—be it lively for outdoor parties or soft and romantic for quiet winter evenings. Brands like Enbrighten and Brightech are often recommended due to their superior build, long-lasting LED technology, and strong warranties. Globe lights and Edison bulb styles are especially popular for their combination of classic looks and modern performance. What kind of light is best for outdoor patio? Answer: LED outdoor patio string lights are favored for energy efficiency and lasting brightness, while vintage-style Edison bulbs offer a classic glow ideal for ambiance. LED-based outdoor patio string lights are the clear choice for most homeowners—they provide brilliant illumination without driving up energy bills, and are available in a wide range of color temperatures and designs. Vintage Edison bulbs give off a nostalgic, golden glow, perfect for creating a welcoming winter patio. If you’re hosting frequent outdoor parties, aim for durable, shatterproof bulbs that can handle rough weather while still looking great. How to string outdoor lights across a patio? Answer: Use sturdy anchor points, measure your space, and choose weather-rated string lights for easy, safe installation across your patio. First, measure your lighting run and plan your design. Attach outdoor-rated mounting hooks or clips to fences, pergola beams, or retaining walls, then securely hang patio lights, ensuring each section is taut and evenly spaced. Always use dedicated outdoor extension cords and protect plug connections from moisture for a safe, lasting installation, especially during the unpredictable conditions of winter. Who makes the best permanent outdoor lights? Answer: Top brands recognized for permanent outdoor string lights include Enbrighten, Brightech, and Hampton Bay, each praised for durability and consistent performance. For permanent outdoor string lighting, Enbrighten is often selected for its robust, all-weather construction and exceptionally long life, while Brightech leads in solar-powered efficiency. Hampton Bay offers a budget-friendlier range without sacrificing much on looks or function, making them a smart pick for homeowners seeking reliable outdoor patio lights that won’t break the bank. Key Takeaways: Elevate Your Winter Evenings with Outdoor Patio String Lights Outdoor patio string lights are an easy, affordable way to boost outdoor living all winter, increasing both style and usable hours on your patio. Choose LED, durable designs, and plan a safe, weatherproof installation—you’ll turn cold nights into cherished gatherings! Ready to Transform Your Space? Discover the Latest Outdoor Patio String Lights Trends at Luxury Landscaping Discover exclusive winter-ready outdoor patio string lights and lighting ideas at Luxury Landscaping. Stay current on the very best outdoor lighting, product innovations, and seasonal décor trends. Give your patio a magical winter glow—shop now! To enhance your patio’s ambiance during winter nights, consider exploring the following resources: “The Best Outdoor String Lights of 2025, HGTV Top Picks”: This article provides a curated list of top-rated outdoor string lights, highlighting their features and suitability for various outdoor settings. (hgtv.com) “10 Best Outdoor Patio String Lights for 2023”: This guide offers a selection of the best outdoor patio string lights, detailing their designs, durability, and performance to help you make an informed choice. (housebeautiful.com) If you’re serious about transforming your patio into a cozy winter retreat, these resources will provide valuable insights and recommendations to guide your lighting choices.

Terms of Service

Privacy Policy

Core Modal Title

Sorry, no results found

You Might Find These Articles Interesting

T
Please Check Your Email
We Will Be Following Up Shortly
*
*
*