Add Row
Add Element
Luxury Landscaping Insider
update
Luxury Landscaping Insider
update
Add Element
  • Home
  • Categories
    • Trendsetters
    • Design Dialogues
    • Transformation Tales
    • DIY Luxe
    • Material Mastery
    • Budget to Bliss
    • Event Spotlight
    • Luxury Landscaping Blog
    • Product Reviews
SUBSCRIBE TO NEWSLETTER  
  • update
  • update
  • update
  • update
  • update
  • update
  • update
December 02.2025
1 Minute Read

No-Freeze Hoses: Prep for Cold Months

Did you know: Just one unexpected freeze can crack a regular garden hose or destroy your outdoor faucet, costing the average homeowner over $250 in repairs—an expense entirely preventable with a winter garden hose. As temperatures plummet, even the toughest standard hose becomes vulnerable to leaks, ruptures, and frustrating loss of water flow. Investing in a no-freeze hose isn’t just smart—it’s your best defense against the headaches of winter damage and ensures your landscape stays cared for year-round. This in-depth guide reveals everything you need to master winter hose prep for cold months, so you can confidently protect your home and outdoor water source—no matter how low the temperature drops.

Why a Winter Garden Hose Is Essential for Cold Weather

"In regions where winter temperatures routinely drop below freezing, a standard garden hose can crack, leak, or become completely unusable, potentially costing you hundreds in repairs or replacements."

winter garden hose coiled on frosty grass next to a lightly frosted outdoor faucet in early winter morning light, photorealistic textures and blue-gray tones

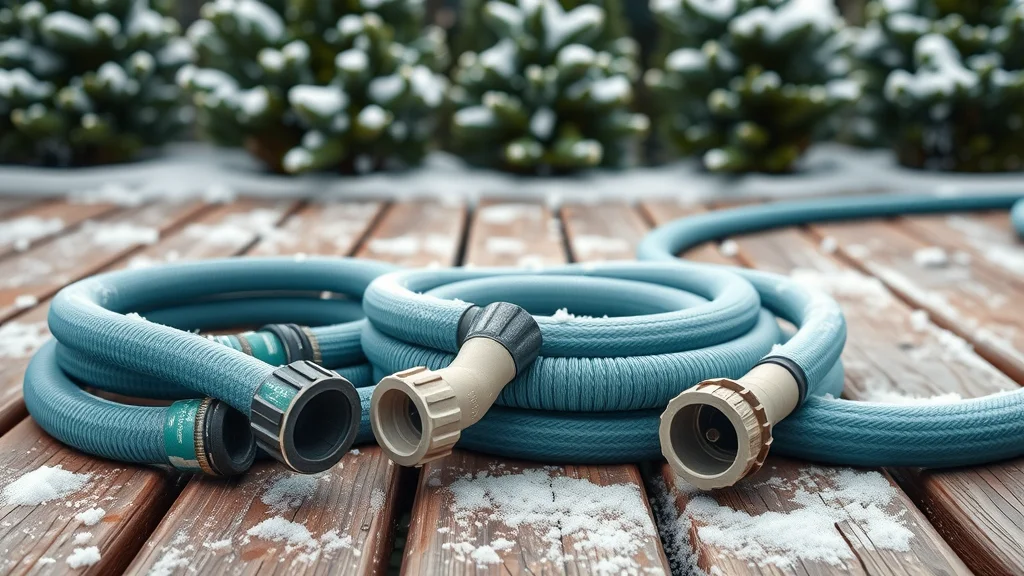
When the thermostat dips below freezing, the vulnerabilities of a typical garden hose become clear. The winter garden hose is engineered specifically for low temperature performance—whereas standard hoses grow brittle, split hose ends, and encourage frozen blockages, no-freeze models use specialized materials and reinforcements to prevent these common failures. This ensures reliable water flow for your landscaping needs, even on the coldest mornings.

Without a winter-ready hose, water inside a standard garden hose can freeze overnight, expand, and rupture the hose, hose couplings, or brass outdoor faucet. If left unchecked, these cracks may go unnoticed until costly repairs are required in spring—or worse, result in substantial leaks that threaten your entire outdoor water source. Upgrading to a durable, winter garden hose is a genuine investment in safeguarding your property from cold weather damage.

What You’ll Learn in This Guide to Winter Garden Hoses

  • Key features and benefits of a winter garden hose
  • How no-freeze hoses compare to traditional garden hoses
  • Tips for selecting the right hose for extreme low temperatures
  • Maintenance, storage, and user reviews

Winter Garden Hose Solutions: No-Freeze, Durable, and Practical

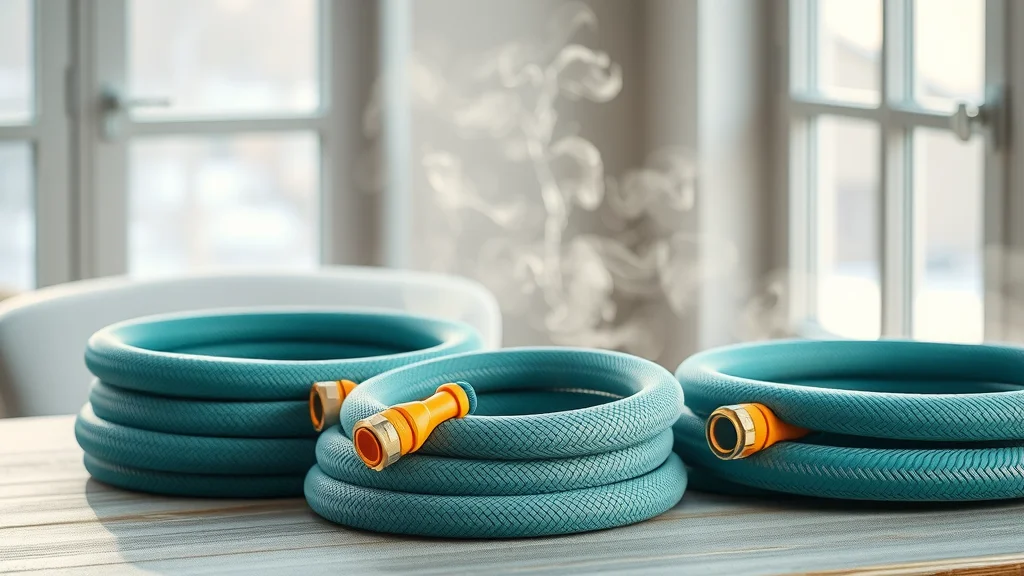
Choosing a winter garden hose can feel overwhelming with brands claiming superior freeze resistance and durability. But only a closer look at product features reveals which models truly deliver—especially in colder climates that demand more than a basic hose. A no-freeze hose combines insulation, flexible rubber, and solid couplings to withstand harsh cold, prevent freezing, and extend its life beyond a single season.

In addition to freeze-proofing, these hoses are typically designed for compatibility with brass outdoor faucets and boast anti-kink construction for hassle-free use and storage during winter. Key buying considerations include low temperature resistance, flexibility in frigid weather, ease of connecting and disconnecting the hose ends, and practical solutions if you use a splitter or need to run the hose to a hot tub or additional water source outdoors.

Comparing Winter Garden Hoses and Soaker Hoses: Which Is Best for Cold Climate Gardening?

While a winter garden hose is built for freezing temperatures, soaker hoses serve a different niche: slow-drip irrigation. In cold climates, soaker hoses can become brittle and clogged with ice, making them less practical for winter water delivery. A premium winter garden hose, however, resists cracking, boasts robust hose ends, and stays pliable even as the mercury plunges. If routine winter watering, animal care, or frequent outdoor use is part of your lifestyle, a no-freeze hose easily outperforms a soaker hose for cold weather reliability.

That said, soaker hoses remain valuable for dormant-season mulching or insulating beds, provided they’re drained and stored properly before consistently freezing nights set in. The main drawback is their limited resistance to damage: when exposed to persistent low temperatures, water inside soaker hoses can freeze, causing microscopic cracks—damage the hose can’t recover from. Ultimately, a true winter garden hose wins for outdoor faucet protection, functional irrigation, and peace of mind.

Comparison of Winter Garden Hose vs. Standard Garden Hoses vs. Soaker Hose
Feature Winter Garden Hose Standard Garden Hose Soaker Hose
Freeze Resistance Excellent (up to -40°F/-40°C) Poor (may crack below 32°F/0°C) Very low (ice blockages, damage likely)
Flexibility at Low Temperature High, remains pliable Stiff and brittle Very stiff when cold
Material Reinforced rubber, insulated, or heated Vinyl or basic rubber Porous rubber or recycled material
Outdoor Faucet Protection Insulated ends, no-freeze features None None
Best Use Winter watering, year-round chores Spring/summer general use Irrigation (not for freezing weather)
Price Range $$–$$$ $–$$ $–$$

side-by-side arrangement of winter garden hose, standard hose, and soaker hose on a snowy wooden deck showing their construction and durability in cold weather

How No-Freeze Hoses Protect Your Outdoor Faucet and Water Source

Your outdoor faucet (also called a spigot or hose bib) is especially vulnerable to freezing, which can result in burst pipes and costly water leaks. The best winter garden hoses include insulated, heavy-duty hose ends that reduce the risk of ice forming in or around the connection to your brass outdoor faucet. Some models incorporate freeze-proof gaskets or even heated wraps at the coupling, ensuring water inside the hose won’t expand and crack the fitting—or the faucet itself—during sudden cold snaps.

Beyond faucet protection, a no-freeze hose preserves the overall integrity of your outdoor water source. Traditional garden hoses, when left attached and full of water during winter, often lead to ice backing up into the faucet or plumbing. This is a major culprit behind springtime leaks and calls to the plumber. Opting for a dedicated winter hose—paired with proper maintenance—delivers worry-free performance and keeps your home’s water supply safe from winter’s worst.

Key Features to Look for in a Winter Garden Hose

  • Low temperature resistance
  • Durable material (eg. rubber, reinforced vinyl)
  • Brass outdoor faucet compatibility
  • Anti-kink and flexible design
  • Insulated or heated options

close up view of insulated winter garden hose showing reinforced layers and brass hose ends for low temperature durability

When evaluating a winter garden hose, focus on those that boast legitimate low temperature ratings (down to -40°F or lower for colder regions), with durable outer jackets and reinforced interiors that won’t split or degrade. Hoses featuring thick, flexible rubber or advanced composite material remain soft and uncoiled even as the weather turns icy. Compatibility with your brass outdoor faucet and premium, crush-proof couplings deliver a reliable connection that withstands seasonal wear.

Look for anti-kink technology and proper coiling guidance to prevent internal damage as well as ensure the hose end fits snugly and securely. Heated and insulated hoses offer exceptional performance in areas prone to prolonged low temperatures, greatly minimizing the risk of water inside the hose freezing overnight. Select a product that clearly states freeze resistance and offers a warranty to protect your investment.

Installation and Maintenance Tips for Garden Hoses in Winter

Securing the Outdoor Faucet and Brass Outdoor Fittings

Start by inspecting your outdoor faucet and all brass outdoor fittings before winter sets in. Tighten the hose coupling at every rendezvous—the faucet, hose ends, and any connected splitter must be free of leaks. If you notice corrosion or cracks at the hose end, replace that component to ensure a watertight seal. Attaching an insulated cover to the brass outdoor faucet and using a properly rated no-freeze hose are essential steps for preventing icy build-up and subsequent freeze damage. Don’t forget: water left inside the hose, especially at the connection or hose coupling, creates the perfect conditions for freezing, so finish installation with a careful check for leaks and secure all fittings before the first frost.

Forgoing routine checks may leave your water source at risk, especially if you run the hose to a garden bed, animal trough, or hot tub. Regularly inspect hoses, twist the coupling as instructed by the manufacturer, and keep documentation handy about installation requirements—many companies include storage tips and maintenance checklists. These simple steps help extend its life throughout the unpredictable swings of colder climates.

Draining, Rolling, and Storing Your Winter Garden Hose

homeowner in winter clothing carefully coiling a flexible no-freeze garden hose beside a snow-dusted shed

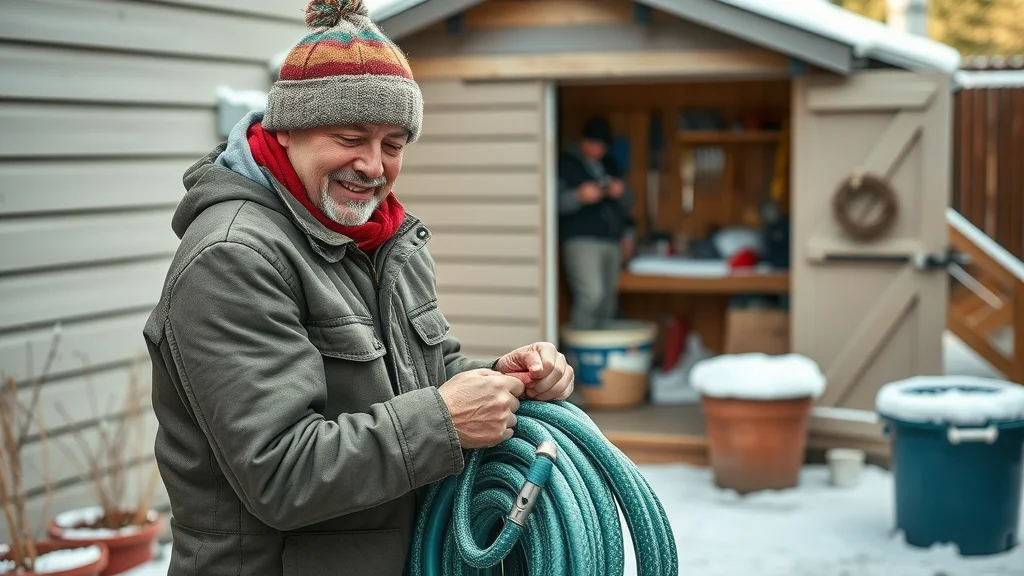
After each use, always disconnect the hose from your outdoor faucet and allow all water inside the hose to drain, using gravity to ensure there’s no standing liquid left in the line. Place one end at ground level and gently raise the hose from the other end; this encourages every drop to exit. Next, employ proper coiling methods—avoid sharp bends or twists at hose ends that could stress the material during storage. Lay the hose flat, form large loops (about 18–24 inches in diameter), and coil gently to avoid kinks or splits in the casing.

Choose a sheltered storage spot—like a shed, garage, or covered porch—to minimize temperature swings, but if outdoor storage is your only option, elevate the coil atop a support to keep it above snow and ice. Following these storage tips reduces the chance of water freezing inside the hose, prolongs its flexibility, and helps prevent those “spring surprises” when a forgotten garden hose winterizes itself the hard way through freeze-induced ruptures.

Preventing Hose Freeze and Blockage at Low Temperature

Prevention is far easier than repair: to prevent freezing and blockage, run the water through the hose only during above-freezing hours, and never leave an unattended hose connected to the water source overnight in cold conditions. If you require continuous water flow—say, for livestock or a hot tub—consider a heated water hose, which includes an integrated heating element to keep water above 38°F, even during temperature dips.

Additionally, after draining, inspect the hose ends and fittings for trapped moisture, then cap or cover them to block ice and debris. For the most extreme climates, insulated wraps or hose covers shield the full length of the hose, especially at vulnerable brass outdoor faucet connections, effectively reducing the risk of low temperature blockages all winter long.

Top Winter Garden Hose Brands and Product Recommendations

  • Flexzilla Garden Hose – Best Coverage for Low Temperature
  • NeverKink Garden Hose – Anti-Kink Freeze Protection
  • Camco Heated Water Hose – Integrated Electrical Heating
  • Zero-G Garden Hose – Lightweight and Cold-Resistant

four best-rated winter garden hoses (Flexzilla, NeverKink, Camco Heated, Zero-G) coiled on a tabletop with soft winter light, showing cold-resistant build and vibrant materials

Each of these brands has earned praise in customer reviews for reliability under cold temperatures, long-lasting construction, and outdoor faucet compatibility. Professional landscapers and homeowners in regions where winter garden hose performance is crucial consistently report stronger flexibility, fewer leaks, and superior protection compared to generic options. Focus on models with solid warranties, insulated or heated features, and hose ends specifically designed for secure coupling with brass outdoor faucets and hose splitters.

Customer Reviews: Real Homeowner Experiences with No-Freeze Garden Hoses

"Switching to a no-freeze garden hose last winter saved my outdoor faucet from bursting and made late-season watering hassle-free." – S. Green, homeowner

happy homeowner watering shrubs with a no-freeze garden hose in a snow-covered yard, hose stays flexible and durable

Homeowners consistently report that traditional hoses simply can’t stand up to repeated freeze/thaw cycles. In contrast, the best winter garden hoses live up to their advertisements: remaining flexible on freezing mornings, preventing ice at the hose end, and delivering uninterrupted performance when connected to brass outdoor faucets or garden hose splitters. Many reviews mention improved peace of mind when running the water to sensitive equipment (like a hot tub) or when last-minute watering is needed in sudden cold snaps.

Frequent users also praise the reduction in maintenance headaches, saying they no longer need to recover lost passwords for warranty repairs or worry about cracking fittings after a tough winter. These endorsements, especially from those in typically harsh climates, underline the consistent value of choosing a specialty hose for garden hose winter use.

Answering Popular Questions about Winter Garden Hose Use

What is the best garden hose for winter?

The best winter garden hose is one specifically rated for subzero temperatures—usually constructed of double-reinforced rubber or with built-in insulation. Brands like Flexzilla, Camco Heated Water Hose, and Zero-G consistently top homeowner and expert lists, offering both flexibility and durability down to -40°F. These models are preferred for their freeze resistance, solid brass outdoor faucet compatibility, and reliable, anti-kink construction.

Can you leave a garden hose out in the winter?

It’s generally not recommended to leave a garden hose outdoors during freezing weather, even if it’s a winter model. Any water inside the hose can freeze and expand, risking blockages or splitting. If you must leave a hose outside for ongoing use, ensure it’s a heated or well-insulated winter garden hose, always drain after use, and store it off the ground with the hose ends capped for added protection.

Is there a garden hose that will not freeze?

No hose is entirely immune to freezing under all conditions, but heated garden hoses (such as Camco Heated Water Hose) and those with high insulation can maintain water flow down to very low temperatures. For best results, use these hoses as directed (plugged in when needed), and always disconnect, drain, and store them after each session to prevent water inside the hose from freezing overnight.

When to winterize a garden hose?

Start winterizing as soon as overnight lows approach 32°F (0°C or lower). Drain all water from the hose, coil it loosely, and move it to covered storage. For garden hoses actively in use during winter (watering animals, hot tub refills, etc.), check connections daily for leaks and backflow, and always have a spare in case of sudden freeze-induced failure.

FAQs: Essential Tips for Your Winter Garden Hose

  • How to choose between heated and insulated garden hoses?
    Heated hoses are ideal for cold climates requiring daily winter use—such as consistent watering, filling a hot tub, or animal care. Insulated hoses provide solid protection for occasional needs or for running water on milder winter days. Consider your average low temperature, intended use, and whether you require plug-in heating before making your decision.
  • Will a garden hose splitter or brass outdoor faucet affect winter performance?
    Quality splitters and brass outdoor faucets improve cold weather performance. However, always select a splitter rated for winter use and check for leaks regularly, as poorly fitted hose couplings can trap water inside, leading to potential freeze bursts.
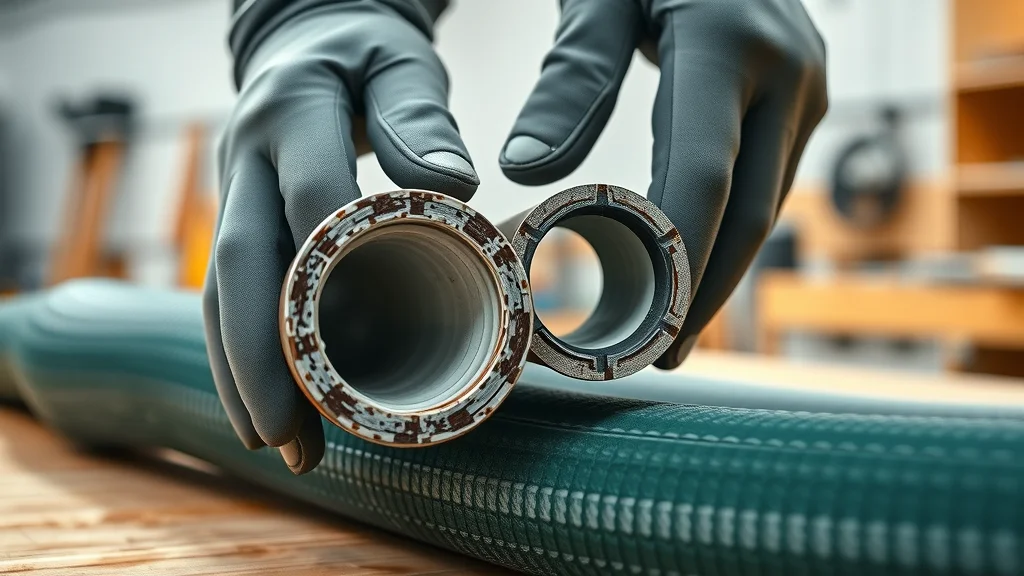
  • What are the signs your hose has suffered winter damage?
    Obvious signals include cracking at the hose end, inability to twist the coupling, leaks near the brass outdoor faucet, hoses that stay rigid at room temperature, or odd odors from water inside the hose. These are all signs it’s time for a replacement.

Expert Advice: Preparing Your Garden Hoses and Outdoor Faucet for Winter

"Properly prepping your winter garden hose, and outdoor faucet is your most effective defense against costly repairs in spring." – Home Improvement Expert

Pro tip: Always disconnect, drain, and store your hose before the first hard frost. Inspect the outdoor faucet and all couplings for leaks, and consider an insulating cover or wrap for added peace of mind. These habits will ensure your garden hoses and brass outdoor faucets withstand winter year after year.

Key Takeaways for Homeowners: Winter Garden Hose Prep

  • Invest in a high-quality winter garden hose to withstand freezing temperatures
  • Early preparation and maintenance can save significant repair costs
  • Evaluate your outdoor water source, including brass outdoor faucets, for total winter protection

Stay Informed: Discover the Latest on Winter Garden Hoses and Outdoor Prep

Ready to protect your home all season—and avoid spring’s costly repairs? Stay current with winter garden hose reviews, product tips, and seasonal prep strategies at LuxuryLandscaping.space!

Conclusion: Don’t let winter catch you off guard—choose a winter garden hose, prep early, and enjoy a worry-free home all season long!

To further enhance your understanding of winter garden hoses and their maintenance, consider exploring the following resources: “Can I leave my garden hoses outside this winter?” by the Oregon State University Extension Service provides expert advice on whether it’s safe to store hoses outdoors during winter and offers tips to prevent damage. (extension.oregonstate.edu) “Learn How to Winterize Your Hose and Garden Tools” from HGTV offers practical steps to protect and store your garden hose and other tools before the first frost, ensuring they remain in good condition for the next season. (hgtv.com) If you’re serious about maintaining your garden equipment through the colder months, these resources will provide valuable insights and actionable tips.

Product Reviews

2 Views

0 Comments

Write A Comment

*
*
Related Posts All Posts
12.03.2025

Start Seeds Indoors: Easy Winter Growing

Did you know that 70% of home gardeners start seeds indoors for better yields? With winter chills keeping gardens dormant, starting your seeds indoors isn’t just a workaround—it’s the secret weapon for robust, flourishing plants come spring. Whether you’re a seasoned green thumb or a hopeful novice, mastering the art of indoor seed starting with the right seed starter kit can revolutionize your results and bring your garden closer, even when snow blankets the world outside. In this guide, we’ll dive deep into the game-changing benefits, crucial features, and product insights that make choosing an indoor seed starter kit the smart move for anyone passionate about homegrown abundance. Did You Know? 70% of Home Gardeners Start Seeds Indoors for Better Yields The numbers don’t lie: more than two-thirds of dedicated gardeners now utilize indoor seed starter kits to overcome weather delays, extend their growing season, and ensure powerful plant starts. This proactive approach to seed starting is not just about beating the winter blues—it’s about empowering you to grow healthier, stronger seedlings that are ready to thrive outdoors when spring finally arrives. Using a seed starter kit indoors means you can carefully control every aspect of your plants’ environment—from soil temperature to moisture, to the precise spectrum of plant lights used for optimal germination and growth. And with the surge in demand for seed starter trays, grow lights, and plant markers, it’s easier than ever to set up a space-efficient, effective indoor seed starting system tailored to your needs. Why Using an Indoor Seed Starter Kit Changes Everything The evolution from old-school DIY seed starting to all-in-one indoor seed starter kits has changed how gardeners approach the winter months. Instead of risking seeds outside or fighting unreliable climate conditions, you have the power to nurture every seed to its fullest potential right from your kitchen counter or sunroom. These kits solve dozens of common gardening headaches—including low germination rates, unpredictable soil temperatures, and the hassle of keeping track of different seed packets. With built-in features like seed starter trays with humidity domes, integrated plant markers, and optimized grow lights, indoor seed starting becomes more precise, easier, and consistently more successful than ever before. “Starting seeds indoors with the right kit can significantly increase germination rates and give your plants a head start on the growing season.” – Horticultural Expert What You'll Learn About Indoor Seed Starter Kits and Seed Starting The essential components of an indoor seed starter kit Step-by-step seed starting process indoors Comparison of popular seed starter products Expert tips for increasing sprouting success How to choose the right grow light for your seed starting kit Why Choose an Indoor Seed Starter Kit for Winter Seed Starting Winter’s frosty grip might usually signal the end of new growth, but with an indoor seed starter kit, the gardening season never truly ends. Using an indoor seed starting kit allows you to strategically dodge unpredictable weather, giving your plant babies the nurturing they need exactly when they need it. From starter trays to high-quality seed pac varieties, these kits cater to every stage of your seed’s life. The result? More vibrant seedlings, stronger beginnings, and the unique joy of seeing green shoots stretch even when snow falls outside. For gardeners determined to maximize their harvest, a seed starter kit isn’t just convenient—it’s essential. Solving the Problem: Overcoming Winter Growing Challenges with Seed Starter Kits One major hurdle for any home gardener is the unpredictability—and often inhospitable nature—of winter weather. Frost, ice, and fluctuating temperatures can spell disaster for the tender early stages of seed development. Indoor seed starter kits directly address these concerns by creating a controlled environment, sheltered from the seasonal extremes that can kill fragile seedlings before they even sprout. By utilizing quality starter trays, humidity domes, and adjustable plant lights, you effectively sidestep unpredictable weather, achieving higher germination rates and healthier starts for your crops. This means you can protect every precious seed, tailoring its care and maximizing its chances for sturdy, disease-resistant growth. Avoid unpredictable weather delays Achieve higher germination rates using quality starter trays Protect delicate seeds with controlled indoor environments “Indoor seed starting kits make it possible to grow robust seedlings—even when snow covers the ground outside.” Key Features to Look For in the Best Indoor Seed Starter Kits Seed Starter Trays and Starter Trays: Materials and Design The foundation of any indoor seed starting kit is the starter tray. Your choice of tray material—ranging from biodegradable to BPA-free plastic to stainless steel—impacts both plant health and your experience as a gardener. Biodegradable trays simplify transplanting, reducing shock to delicate roots, while BPA-free trays offer repeated reusability without contaminating your soil. For the longest-lasting and most mold-resistant option, stainless steel starter trays lead the pack, outperforming both plastic and compostable models. The right starter trays typically also come with multiple cells for organizing different seed pac varieties and support consistent drainage, critical for preventing root rot and encouraging strong seedling development across your seed starting journey. Grow Lights and Plant Lights: Boost Germination and Growth No matter how inviting your window sills, some seeds demand more light than winter sun provides. Advanced seed starting kits feature integrated grow lights or full-spectrum plant lights that replicate natural sunlight, stimulating photosynthesis and promoting healthy, bushy seedling growth. These bright plant lights help maintain steady temperature and humidity, both crucial for germination. Adjustable settings make it easy to cater light levels to each plant’s stage of development, eliminating the pitfalls of leggy, weak plants. By investing in kits with quality grow lights, you radically improve germination rates and set your seedlings on a strong path from the first day. Integrated Plant Markers and Garden Planners Organization is the backbone of successful indoor seed starting. The best seed starter kits include not only plant markers for easy tracking of each starter tray’s contents, but also gardener-friendly planning tools—like printable or digital garden planners that help you chart sowing schedules and rotation plans. Plant markers become essential when managing multiple seed pac or seed packet varieties in the same batch, ensuring that by the time your seedlings are ready for transplant, you know exactly which cells contain tomatoes, peppers, or leafy greens. This attention to planning and tracking prevents costly mix-ups and supports efficient garden planning for the entire grow season. Compatibility with Different Seed Packets and Seed Packs Versatility is key. Not all starter trays or seed starter kits accommodate larger seeds or specialty seed packs. Smart kit design features allow for flexible cell sizes and varying depths, ensuring compatibility with your favorite seed packets. Whether sprouting smaller lettuce seeds or bulkier beans, a top-quality kit makes sure every type has the space and support it needs. Look for kits boasting included accessories—like adjustable plant lights, reusable plant markers, and modular tray designs—that adapt to any variety you choose to start for your indoor or eventual outdoor garden. Comparing Top-Rated Indoor Seed Starter Kits Kit Name Starter Tray Material Grow Light Included Plant Marker Included Price Customer Reviews HomeGrow Deluxe BPA-Free Plastic Yes Yes $32.99 4.8/5 StarterPro Kit Stainless Steel No Yes $28.50 4.6/5 EcoSprout Plus Biodegradable Yes No $25.00 4.4/5 “Stainless steel starter trays last longer and resist mold better than plastic alternatives.” Step-by-Step: How to Use an Indoor Seed Starter Kit for Seed Starting Fill the seed starter tray with quality seed-starting mix Place seeds according to seed packet instructions Label with plant markers to track varieties Moisten the soil and cover with dome if included Set up grow lights for optimal indoor seed starting Monitor moisture and temperature until germination “Using a grow light can almost double your seedling growth rate indoors.” Step-by-Step Demonstration of Indoor Seed Starting Kits People Also Ask: Indoor Seed Starter Kits [[paa]] Comprehensive Answers to Top Indoor Seed Starter Kit Questions How do you use an indoor seed starter kit? – Place seeds in starter trays, keep soil moist, and provide adequate light with grow lights. It's crucial to follow the instructions on the seed packet for proper depth and spacing and to use plant markers for clear organization. What is the best seed starting kit for beginners? – Look for seed starter kits with quality starter trays, integrated plant markers, clear humidity domes, and adjustable grow lights. Kits with BPA-free or stainless steel trays and instructional guides simplify the process, making them ideal for first-timers. How many seeds should I plant per starter tray cell? – Typically 1-2 seeds per cell as specified on the seed packet. Planting more can cause overcrowding and root entanglement, while planting too few can result in gaps if germination is low. Frequently Asked Questions About Indoor Seed Starter Kits Do seed starter trays require special soil? – Yes, it’s best to use a fine, sterile seed-starting mix. Regular garden soil can harbor pathogens and may not provide the fine texture young seeds require for optimal growth and healthy root development. Can I reuse starter trays from previous seasons? – Absolutely! Just be sure to thoroughly clean and disinfect trays at the end of each season to prevent disease. Stainless steel trays, in particular, are prized for reusability and ease of sanitizing. What kind of grow light is best for indoor seed starting? – Look for adjustable, full-spectrum LED grow lights that can be placed close to the tray and set on timers. This ensures consistent light intensity and coverage for even, strong seedling development from the earliest days. Key Takeaways: Mastering Indoor Seed Starter Kits An indoor seed starter kit streamlines your seed starting process year-round. Grow lights dramatically improve seedling success and quality. Selecting the right starter tray and accessories increases germination rates. Starter kits are suitable for novices and seasoned gardeners alike. Start Your Indoor Seed Starter Kit Journey and Grow Year-Round Stay current with https://luxurylandscaping.space/ for expert tips, product updates, and indoor gardening inspiration this season! Starting seeds indoors during winter can significantly enhance your gardening success. To assist you in this endeavor, consider exploring the following resources: “The Best Seed Starter Kits”: This article provides a comprehensive review of top-rated seed starter kits, highlighting their features and benefits to help you choose the right one for your needs. (ehow.com) “8 Highly Recommended Indoor Grow Light & Seed Starter Kits”: This guide offers insights into various indoor grow light and seed starter kits, detailing their specifications and suitability for different gardening goals. (theultimatehomestead.com) If you’re serious about optimizing your indoor seed starting process, these resources will provide valuable information to help you select the best equipment for your gardening endeavors.

12.01.2025

Keep Birds Cozy: Heated Bath Essentials

Startling statistic: Did you know that over 70% of backyard birds may not survive harsh winters without access to liquid water? This isn’t just about comfort—it’s about survival. As frost sets in and water sources freeze, your feathered friends could be facing life or death each night. In this comprehensive guide, you’ll discover how a heated birdbath for winter can turn your backyard into a critical sanctuary, keeping wild birds thriving even in the coldest months. Ready to make your garden a winter haven? Startling Facts: Why a Heated Birdbath for Winter Is More Important Than You Think Over 70% of backyard birds may not survive harsh winters without access to liquid water. – Audubon Society When temperatures dip below freezing, bird baths, natural water sources, and puddles all turn solid—cutting wild birds off from hydration they desperately need. Dehydration in winter can be as fatal as hunger, making a heated birdbath for winter one of the most effective ways to support local wildlife and keep backyard birds healthy. For homeowners passionate about supporting their garden’s biodiversity, providing a reliable water source is just as crucial as feeding high-calorie seeds. A heated bird bath does what traditional bird baths and bath bowls can’t: maintain ice-free water on demand, even in the coldest temperatures. This key feature doesn’t just help backyard birds; it attracts a diverse array of species, ensuring your garden remains a vibrant hot spot for wild bird activity all winter long. If you want your yard alive with color and song, a heated birdbath is more than a luxury—it’s a necessity. What You’ll Learn About Heated Birdbath for Winter Essentials The surprising impact of heated bird baths on backyard birds’ survival Key features that distinguish the best heated bird baths How thermostatically controlled and solar heaters differ Expert tips for choosing the right heated birdbath for winter Heated Birdbath for Winter: An Overview of Bird Bath and Bird Baths Benefits Why Birds Need a Heated Bird Bath in Winter Consistent water supply during freezing temperatures Supporting wild birds and local backyard birds Preventing ice build-up in traditional bird baths Providing a heated birdbath for winter is a game-changer for local wildlife, ensuring a steady, ice-free water source when lakes, ponds, and puddles have frozen solid. During colder months, birds need water not only for hydration but also for preening and keeping their feathers in optimal condition. A reliable water source becomes critical for species like cardinals, chickadees, and other wild birds that overwinter in your region. Unlike a standard bird bath that quickly turns to ice in low temperatures, a heated bird bath keeps water liquid and accessible, reducing the risk of dehydration and frostbite. It ensures that birds have the resources they need both to drink and maintain the waterproofing and insulation of their feather coatings—essential for enduring winter’s worst. Supporting survival during extreme conditions makes your backyard birds loyal garden visitors, brightening the snowy months with life and song. How Heated Bird Baths Work: The Technology Behind the Warmth Thermostatically controlled units explained Bath heater vs. bird bath heater: Key differences Heated rock, deck mount, and pole mount options At the heart of every heated birdbath for winter is a smart, energy-efficient solution—typically a built-in, thermostatically controlled heating element under the bath bowl. This ingenious technology senses air temperatures and automatically turns on only when needed, preventing water from freezing without wasting energy on milder days. Some models use a dedicated bath heater insert, transforming an existing bird bath into a powerful, ice-defying oasis. Options range from built-in dish heaters (integrated with deck mount, pole mount, or ground baths) to add-on heated rocks. While deck and pole mounts offer secure installation options for a variety of yard sizes, heated rocks and drop-in bath heaters provide flexibility for homeowners with existing baths or unique landscaping features. Selecting the right configuration comes down to your garden’s needs, local climate, and whether you want a permanent or portable solution. Types of Heated Bird Baths for Winter: Comparing Deck Mount, Heated Deck, Pole Mount, and More Deck Mount Heated Bird Baths A popular style for suburban homes, deck mount heated bird baths clamp securely to flat surfaces—such as deck rails or porch ledges. These baths are typically easy to install and keep water close to your favorite viewing spot, adding beauty and wildlife interest to daily routines. Many feature thermostatically controlled systems and cord connect designs, allowing for safe outdoor use and easy access to electrical outlets. High-quality deck mount models often include easy-to-remove bath bowls for cleaning, and robust power cords that resist weather. The visibility and convenience make them a favorite among bird lovers looking to maintain a winter-friendly birding station just steps from their house. If you have a deck or patio, these models ensure a front-row seat to wild bird action while providing essential winter support for your feathered guests. Pole Mount Heated Bird Baths Pole mount heated bird baths are ideal for larger gardens or yards without convenient railings. With the ability to situate them anywhere in your landscape, these baths attract a greater variety of wild birds away from foot traffic and pet interference. The pole mount design often elevates the water source above snow and predators, improving safety and accessibility for birds during cold months. These models usually offer larger bath bowls, robust thermostatic controls, and long, weatherproof power cords. For those interested in optimizing their yard for bird diversity, a pole mount or ground option can provide the most natural, accessible, and secure drinking stations, acting as important winter lifelines. Heated Deck Options: Portable and Stationary Solutions You’ll find portable and permanent heated deck solutions catering to various landscaping needs and homeowner preferences. Portable heated birdbaths are lightweight, easy to reposition, and ideal for renters or those who want flexibility season-to-season. Stationary versions, on the other hand, offer durability, larger water capacity, and enhanced stability—perfect for harsh or windy climates. Each of these bath types aims to maintain unfrozen water, utilizing built-in bath heater mechanisms or drop-in heating elements. Whether you choose a movable heated bath or a sturdy, fixed installation depends on your garden's design, exposure to sun, and where birds naturally congregate. Both options ensure your backyard birds have the water access they need all winter long. Heated Rock and Terra Cotta Bird Baths For Winter Heated rock and terra cotta bird baths offer a natural aesthetic for homeowners who want a subtle, garden-integrated look. Heated rocks can be placed in any bird bath bowl, instantly transforming traditional designs into winter-proof refuges. While terra cotta baths are loved for their rustic charm, they require careful selection—look for models with integrated, waterproof heaters designed for cold-weather performance. Homeowners should check compatibility with thermostatic controls and weatherproof cord connect designs. The flexibility to use heated rock inserts, combined with classic terra cotta beauty, means you don’t have to trade style for survival—your feathered friends can enjoy both. Top Features to Look for in a Heated Birdbath for Winter Thermostatically controlled features Energy efficiency and cord connect designs Designs for various wild bird species and backyard settings Buying the right heated birdbath for winter isn’t just about warming water—it’s about matching the best technology to your specific needs. Thermostatically controlled features allow your bird bath heater to operate only in cold temperatures, reducing unnecessary energy use. A well-chosen heated bird bath will minimize your winter electricity bill while keeping the water from freezing 24/7. Energy efficiency comes from superior insulation, well-sealed electrical cord connect points, and sturdy construction optimally designed for outdoor conditions. Look for models with removable bowls for easy maintenance—a crucial consideration for busy homeowners. The best baths support a wide array of wild birds, from small songbirds to larger backyard birds, ensuring that your winter haven truly makes a life-saving difference. ‘A well-placed heated bird bath can mean the difference between life and death for many backyard birds.’ – Ornithologist Dr. L. Harper Best Heated Bird Baths for Winter 2024: Expert Reviews and Recommendations Model Mount Type Thermostatically Controlled Heating Element Price User Rating Allied Precision Heated Bird Bath Deck Mount Yes 150W $59.99 4.7 API Heated Birdbath Pole Mount Yes 120W $64.99 4.6 Farm Innovators Bird Bath Heater Drop-In Insert Yes 200W $39.99 4.5 Heated Bird Bath Pricing Guide Price is an important factor for many homeowners considering a heated birdbath for winter. Standard deck mount or pole mount models with built-in thermostatically controlled heaters usually range between $50 and $80, with premium models offering additional features like cord protection, deeper bath bowls, and frostproof materials. Add-on or drop-in bird bath heaters (for use with existing bird baths) are typically more affordable, starting around $35. While initial investment is higher than an unheated bird bath, ongoing energy costs are relatively low due to thermostatic regulation. The peace of mind, increased backyard bird traffic, and the joy of watching thriving wildlife in winter more than justify the price for many homeowners. Pros and Cons: Heated Birdbath for Winter Options Pro: Keeps water ice-free at all temperatures Pro: Attracts wild birds year-round Con: Energy usage and cord management needs While the benefits are numerous, it’s important to weigh potential drawbacks. Heated bird baths require proper placement and access to a safe electrical connection outside. Cord management is a must—taut, well-placed power cords and cord connect covers help prevent trips and animal damage. On the plus side, these baths dramatically increase your winter bird-watching opportunities and play a direct role in your local wild bird population’s survival. How to Choose the Right Heated Bird Bath for Your Backyard Assessing yard size and placement: deck mount, pole mount, or ground bath? Material selection: terra cotta, resin, plastic, or metal? Compatibility with bird species: wild bird, songbird, and backyard birds consideration Before purchasing your heated birdbath for winter, consider your yard's unique features. Deck mount baths are ideal for raised platforms, patios, or balconies, while pole mount and ground-level options provide greater flexibility for open spaces and larger gardens. The variety in material—from lightweight plastic and resin to classic terra cotta and robust metal—affects both winter durability and cleaning ease. Lastly, think about your most frequent feathered visitors. Smaller birds will appreciate shallow, gently sloped bowls, while birds like robins or even mourning doves need slightly deeper bird baths. Investing in a model compatible with both your landscape and your local bird population will ensure your bath remains a centerpiece of avian activity all winter long. Installation Tips: Plug-In Cord Connect & Solar Solutions Most heated birdbaths for winter feature traditional plug-in power, requiring a weatherproof, outdoor-rated outlet nearby. Secure any power cord or cord connect to stabilize the bath and prevent unwanted interference from wildlife or heavy winds. For lawns and gardens far from an outlet, solar solutions exist, but make sure they're rated for winter use—solar bird bath heaters can struggle in cold, cloudy climates. Always follow manufacturer instructions for mounting—especially for deck and pole mount options—to ensure stability and safe operation in snowy and icy conditions. Maintenance and Cleaning Best Practices for Winter Use Proper maintenance is the key to both longevity and bird health. Clean the bath bowl weekly by removing old water, scrubbing the surfaces with a gentle brush, and rinsing thoroughly to remove algae, contaminants, and bird droppings. Heated baths often need less scrubbing than unheated versions, as moving, warm water inhibits ice and slime buildup. Check the heating element and cord for signs of wear or damage in early winter and again during extreme cold snaps, and never use abrasive cleaning agents or expose the thermostat to freezing temperatures without water in the bowl. Proper care ensures your investment remains effective season after season—keeping your feathered friends safe all winter long. Safety Considerations for Heated Bird Baths Safety first: always use electrical cords that are outdoor-rated, and protect plug-in connections from snow with a weatherproof cover. Avoid using extension cords unless specifically rated for outdoor winter use, and make sure the bath bowl is always filled before plugging in the heater to prevent damage. Position your heated bird bath away from high-traffic paths to minimize cord tripping hazards. Monitor for any signs of malfunction (like excessive heat, smoke, or electrical buzzing). If you notice a problem, unplug immediately and consult the manufacturer for guidance or replacement. By following these precautions, you ensure your birds’ winter safety and your own peace of mind. Heated Birdbath for Winter: People Also Ask Should I use a heated bird bath in winter? Yes, using a heated bird bath for winter helps birds stay hydrated and survive the cold by providing ice-free water throughout the season. A heated birdbath for winter is strongly recommended by wildlife experts, particularly in regions prone to weeks or months of freezing temperatures. Birds expend precious energy searching for water, and the availability of liquid water at a single reliable location can mean the difference between life and death. These baths reduce stress on bird populations and provide consistent opportunities for birdwatchers and nature lovers. Why put a penny in your birdbath? Placing a copper penny can inhibit algae and bacteria growth due to copper’s antimicrobial properties, but ensure it is older copper pennies, as newer ones are mostly zinc. The tradition of adding a copper penny to your birdbath stems from copper’s natural antimicrobial abilities. It helps reduce algae growth and bacteria—both of which can make the bath slippery or unsafe for your feathered friends. For best results, use a few pre-1982 pennies (which are nearly all copper) rather than newer coins, which include mostly zinc and may not offer the same benefits. What is the best heated bird bath? The best heated birdbath for winter will include thermostatic control, an easy-to-clean design, and a durable mount. Top picks include the API Heated Birdbath and Allied Precision models. While several excellent brands exist, thermostatic control is the feature most experts recommend for ultimate reliability and efficiency. The API Heated Birdbath (pole mount) and Allied Precision Heated Bird Bath (deck mount) consistently earn top marks for ease of cleaning, rugged construction, and long-term winter performance. Do solar birdbath heaters work? Solar birdbath heaters are eco-friendly and can work in mild to moderate winter conditions but may struggle in extreme cold compared to plug-in heated birdbaths. Solar-powered bird bath heaters appeal to homeowners looking to minimize energy bills or install a bath far from an electrical source. However, most solar baths perform optimally in moderate climates and may not keep pace with hard freezes in northern locations. For guaranteed ice-free bird bath water through the coldest weather, a plug-in bath heater with robust thermostatically controlled features is your safest bet. FAQs About Heated Birdbath for Winter and Bird Baths How much electricity does a heated birdbath for winter use? Most models use between 50W and 200W. When thermostatically controlled, they only heat when needed, typically costing just a few dollars per month. Can I leave my heated bird bath plugged in all season? Yes, provided you check water levels regularly, use a proper outdoor-rated cord, and inspect for damage after storms or power surges. Do heated bird baths attract more birds? Absolutely! Birds seek out liquid water in winter, and a heated birdbath can quickly become the go-to gathering spot for a variety of backyard birds. Key Takeaways: Ensuring Wild Birds Thrive with a Heated Birdbath for Winter Investing in a heated bird bath is a lifesaver for backyard birds. Choose the right features: thermostatically controlled, energy efficient, and species-compatible. Proper care and placement are vital for optimal performance and safety. Summary: Give Your Backyard Birds the Comforts of a Heated Birdbath for Winter A heated birdbath for winter elevates your garden from simply scenic to truly life-sustaining—ensuring every bird, from chickadee to cardinal, finds the comfort, hydration, and warmth they need throughout the frostiest months. Want More Tips? Stay Current with LuxuryLandscaping.Space For up-to-date guides and inspired landscaping ideas, visit LuxuryLandscaping.Space—your partner in creating stunning, wildlife-friendly backyards all year round! To enhance your understanding of heated birdbaths for winter, consider exploring the following resources: “Heated Birdbaths Help Birds Survive Winter”: This article from Wild Birds Unlimited discusses the importance of providing a heated water source for birds during freezing temperatures, emphasizing how it aids in their hydration and feather maintenance. (sudbury.wbu.com) “Top 5 Heated Birdbaths: Reviews & Buying Guide for Winter Birds”: HelmetsLab offers a comprehensive review of the best heated birdbaths available, detailing features, pros, and cons to help you make an informed purchase. (helmetslab.com) If you’re serious about supporting your backyard birds through the winter months, these resources will provide valuable insights and recommendations to ensure they have access to essential water sources.

11.30.2025

Shield Your Plants: Winter Frost Defense Guide

Did you know that sudden frost kills nearly half of unprotected garden plants each winter? With unpredictable cold snaps on the rise, every homeowner can protect their landscape—and investment—by using a frost protection blanket. Discover how these essential plant covers hold the key to thriving gardens, even during the coldest months. Why Every Gardener Needs a Frost Protection Blanket This Winter Each winter brings a familiar challenge: unexpected frost and cold temperatures that can devastate even the most well-cared gardens overnight. Gardeners spend months nurturing vegetables, perennials, and ornamentals, only to watch them fall to the mercy of a single icy night. Frost protection blankets are specifically designed to protect your plants from frost and cold, acting as a tried-and-true solution for plant conservation during severe weather. These blankets are designed to retain heat, shield delicate stems, and even allow for essential moisture and air flow—making them superior to improvised covers or basic sheets. Beyond their technical attributes, frost protection blankets offer emotional relief for any home gardener. Imagine the confidence of knowing your cherished plants—and all your hard work—are shielded, even on the most frigid mornings. When used properly, frost blankets and plant covers can increase winter survival rates dramatically, taking the uncertainty out of even the coldest garden seasons. "Studies show that up to 50% of unprotected garden plants perish in unexpected frost—don't let your garden become another statistic." What You'll Learn: Maximizing Plant Protection with Frost Blankets How frost protection blankets outperform standard plant covers Essential features to look for in frost blankets Choosing the right frost blankets for your plant covers needs Installation steps for effective frost protection Answers to common frost protection and plant cover questions Comparing Plant Cover Options: Why Frost Protection Blankets Stand Out When it comes to protecting your plants, not all plant covers are created equal. Many gardeners try makeshift solutions—from old bed sheets to plastic tarps—but these materials rarely provide the insulation or breathability crucial for plant survival during harsh winter snaps. Frost protection blankets, also known as frost blankets or frost cloths, are optimized for plant protection: their materials insulate against cold, prevent frost from directly settling on leaves, and are breathable to avoid moisture buildup. Compared to standard plant covers or row covers, frost blankets stand out for their durability, ease of use, and superior insulation. In addition, blanket protection supplies designed for gardening purposes are reusable and eco-friendly, reducing waste and costs in the long run. For homeowners serious about resilient lawns and landscapes, understanding how frost blankets compare to other covers helps you invest wisely, ensuring your garden flourishes even during the worst frost and cold temperatures. Comparison of Frost Protection Blanket vs. Other Plant Covers Feature Frost Protection Blanket Row Cover Frost Cloth Basic Cloth/Sheet Price $$ $ $$ $ (Low) Insulation High Medium Medium-High Low Breathability Yes Yes Yes Limited Durability High (Reusable) Moderate High Poor Ease of Use Simple Simple Simple Variable Key Features and Benefits of a Frost Protection Blanket Multiple thickness options for various frost conditions Breathable material prevents moisture build-up Reusable and eco-friendly Superior insulation compared to basic frost covers and cloth Easy to install over all plant covers and shapes Frost protection blankets provide gardeners and homeowners with flexible solutions. Available in different thicknesses, you can choose blankets tailored for moderate or severe cold temperatures, ensuring your winter plant protection matches local conditions. Their breathable fabrics minimize dampness under the cover, which is critical for plant health and prevention of mold or rot. These blankets are designed for multi-season use, reducing plastic waste and eliminating the need to constantly purchase new protection supplies. In addition, installing them is quick—whether over garden beds, individual shrubs, or even fruit trees. With frost protection blankets, you'll optimize both the effectiveness and convenience of your winter plant care routine. How Frost Protection Blankets Shield Your Plants from Heavy Snow and Cold Winter's harshest elements—snow, sleet, and biting winds—pose unique challenges for garden survival. Frost protection blankets create a physical and thermal barrier, insulating against abrupt temperature changes. Their layered construction traps ground heat and reduces airflow directly around plants, minimizing frostbite and ice accumulation on leaves and stems. Unlike basic frost covers or thin row covers, frost blankets can handle both light and moderate snowfall, distributing the weight and preventing snow from crushing delicate growth. For areas prone to consistent heavy snow, using thicker frost blankets or combining them with sturdy row covers can maximize plant protection, making your garden resilient to winter's extremes. Integrating Row Covers and Frost Blankets for Enhanced Plant Protection One of the best strategies for unbeatable winter plant protection is to layer solutions, combining row covers and frost blankets. Lightweight row covers keep frost off leaves on milder nights while allowing sunlight in. When severe cold strikes, laying a heavier frost blanket atop a row cover provides double insulation—preserving crucial ground heat and safeguarding the most vulnerable growth. This integrated approach allows homeowners and gardeners to protect your plants from unexpected blasts of cold temperatures and maximize survival rates. If you’re a home gardener with high-value ornamentals or food crops, integrating plant covers and frost blankets is a smart, proactive step that pays dividends all winter long. How to Choose the Right Frost Protection Blanket for Your Garden Assessing your garden's specific needs: frost level, snow exposure, and plant types Understanding material qualities: from frost blanket to frost cloth Sizing tips for plant covers and blanket protection Reviews of top-rated frost blankets and covers Selecting the ideal frost protection blanket starts with a clear assessment of your landscape. Do you experience light or frequent hard frost? Does your yard endure heavy snow, or is it exposed to chilly winds? Matching the thickness and size of your blanket to the threats ensures optimal plant protection. Some gardens benefit most from thick, insulated frost blankets; others thrive with lightweight, breathable frost cloth or row cover. Don't forget to evaluate durability, especially if you’ll be reusing your blanket across multiple seasons. Highly rated brands offer tough, UV-stabilized materials that withstand repeated frost cycles. Sizing is also crucial: ensure your plant cover extends well beyond the drip line for maximum insulation. For the best results and value, consult reviews from home gardeners and sources like Greenhouse Megastore to identify blankets that offer free shipping, durability, and consistent performance. Installation Guide: Using Your Frost Protection Blanket for Maximum Plant Protection Prepare your garden beds and trim any fragile stems Choose appropriate frost blankets, cloth, or covers Drape frost protection blanket or plant cover loosely over plants Secure edges with stakes or garden clips for blanket protection Remove covers during the day if sunlight and temperatures allow Installing a frost protection blanket isn't complicated, but taking the time to do it right ensures the best plant protection possible. First, clear away old debris and trim plants as needed; this prevents frozen leaves from coming into direct contact with the blanket. Select your chosen plant cover—whether a heavy-duty frost blanket, frost cloth, or row cover—and drape it loosely so insulation can trap warm air. Avoid pulling the blanket tight to the ground, as it can reduce thermal protection. Secure the edges thoroughly. Use garden stakes or clips to prevent strong winds from dislodging the cover. On warmer days, lift or remove the cover to give your plants sunlight and fresh air—excess humidity can sometimes be as damaging as frost. This routine, when followed, ensures your investment in plant covers and frost protection blankets pays off with vibrant spring growth. Expert Tips: Maintaining Your Frost Protection Blanket and Plant Covers Tips for cleaning and storing frost blankets and covers Inspect plant covers for wear and tear after severe frost Best practices for long-term plant protection Proper care of your frost protection blanket extends its life and safeguards your plants season after season. After each use, shake off dirt, leaves, or snow, and let the fabric dry naturally before folding. Wash lightly with mild soap if needed—most blankets are durable enough for gentle cleaning without losing insulation properties. Once winter passes, inspect plant covers for holes or worn areas: timely repairs mean your blanket or frost cloth will provide reliable coverage next year. Store your blankets in a cool, dry, pest-free area, ideally rolled or loosely folded on a shelf in a garden shed. Following these habits ensures your plant protection supplies are always ready, maximizing both your investment and your garden’s resilience. People Also Ask: Frost Protection Blanket Essentials Do frost blankets actually work? Frost protection blankets are proven to shield plants from sudden temperature drops, retaining ground heat and reducing the risk of plant damage—making them an essential part of any plant cover strategy. What can I use for a frost blanket? Commercial frost protection blankets, frost cloth, row cover, and even specialized plant covers deliver the best results. Old sheets or burlap can serve in emergencies, but dedicated frost blankets offer superior insulation. Can frost blankets protect from heavy snow? Quality frost protection blankets can handle moderate snow by providing insulation and preventing ice from reaching leaves and stems, but for heavy snow, thicker covers or layering with row covers is recommended. How long can a frost blanket stay on? Generally, leave frost protection blankets or plant covers on for several days to two weeks. On warmer days, remove covers to prevent humidity buildup and allow sunlight exposure for healthy plant growth. Top Recommended Frost Protection Blanket Brands and Reviews Analysis of leading frost blankets for plant cover Best practices for choosing frost blankets with durable material and high user reviews Where to buy frost protection blankets and average costs With so many choices available, how do you find the best frost protection blanket for your garden? Top brands in the U.S.—such as Agribon AG, FrostGuard, and offerings from Greenhouse Megastore—are well-known for quality, durability, and value. Consider blankets that are UV-resistant, have reinforced edges, and offer multiple thicknesses for variable seasons. Home gardeners recommend sourcing frost blankets from specialized garden suppliers or megastores that offer fast shipping and solid customer service. Check reviews for comments on ease of installation, insulation performance, and how blankets hold up after freezing rain or snow. Investing in high-rated, sustainable options ensures you protect your plants with confidence all winter long. FAQs About Frost Protection Blankets and Plant Covers Can I use a frost blanket on fruit trees? Yes, many frost protection blankets are large enough and flexible to wrap or drape over small-to-medium fruit trees, providing vital protection during early or late spring frosts. Are frost protection blankets safe for all plant types? Frost blankets are designed for use on vegetables, perennials, annual flowers, and even tender shrubs. Always follow packaging instructions for best results on sensitive species. Is a frost blanket better than standard plant covers? Absolutely. Frost blankets provide superior insulation and breathability compared to standard sheets, plastic tarps, or thin plant covers—making them the top choice among serious home gardeners. How do I prevent wind from lifting the plant cover? Use garden stakes, pins, or heavy-duty clips to secure the edges. If your yard is windy, bury the fabric edge in soil or place rocks along the perimeter for extra security. Key Takeaways: Frost Protection Blanket Strategies for Winter Success Frost protection blankets are vital for safeguarding plants during severe winter events. Choosing the correct size and type enhances plant protection and overall winter survival. Maintenance and proper installation of plant covers ensure season-long effectiveness. Secure Your Garden's Future—Discover More Winter Lawn & Frost Protection Insights Want to keep your landscape healthy all winter long? Watch our expert video guide below and stay current with Luxury Landscaping for more tips and product updates! How-to guide: Demonstrating the installation of frost protection blankets, best practices, and common mistakes — clear step-by-step visuals for homeowners. Stay current with https://luxurylandscaping.space/ To enhance your understanding of frost protection blankets and their benefits, consider exploring the following resources: “Row cover”: This Wikipedia article provides an overview of row covers, including their materials, uses, and benefits in agriculture and gardening. (en.wikipedia.org) “Horticultural fleece”: This Wikipedia entry discusses horticultural fleece, a type of frost protection fabric, detailing its methods of use and applications in extending growing seasons and protecting plants from pests and cold weather. (en.wikipedia.org) If you’re serious about safeguarding your plants during winter, these resources will offer valuable insights into effective frost protection methods.

Terms of Service

Privacy Policy

Core Modal Title

Sorry, no results found

You Might Find These Articles Interesting

T
Please Check Your Email
We Will Be Following Up Shortly
*
*
*